As all of you know, reconnaissance is critical to being successful in a pentest or hack. Recon is where we gather all the information we need to determine the best strategy for hacking. Without good recon, we are likely to waste many hours and be unsuccessful. Professional hackers know that good recon is key to success.
In this tutorial, I’d like to demonstrate another recon/enumeration tool named Sparta—a Python script that integrates several recon and enumeration tools into a single, simple to use GUI. Sparta integrates the following tools, many of which we have already used throughout this series on recon:
- Nmap
- Hydra
- Nikto
- CutyCapt
- Mysql-default
- Snmp-enum
- Smtp-enum-vrfy
- Snmp-default
- Snmp-check
- Netcat
Sparta is built into Kali 2.0, but if you don’t have it, you can get it from the Kali repository by typing:
kali > apt-get install sparta
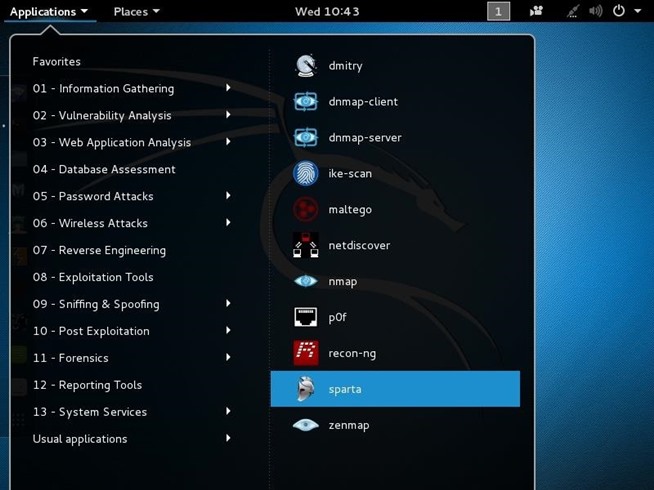
Step 1: Fire Up Kali
Of course, the first step is to fire up Kali. In this case, I will be using Kali 2.0 as Sparta is already built in. Go to Applications -> Information Gathering ->sparta.
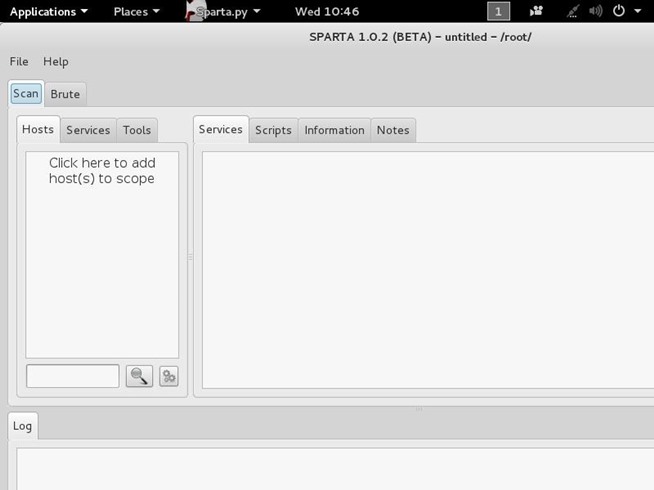
When you click on it, a GUI like that below will open.
Step 2: Add Hosts
To get started with Sparta, we need to provide it with hosts to scan and enumerate. If we click on the space that says “Click here to add host(s) to scope,” it opens a window where we can add the IP addresses or the range of IP addresses to scan. We are also able to use CIDR notation to indicate an entire subnet such as 192.168.181.0/24.
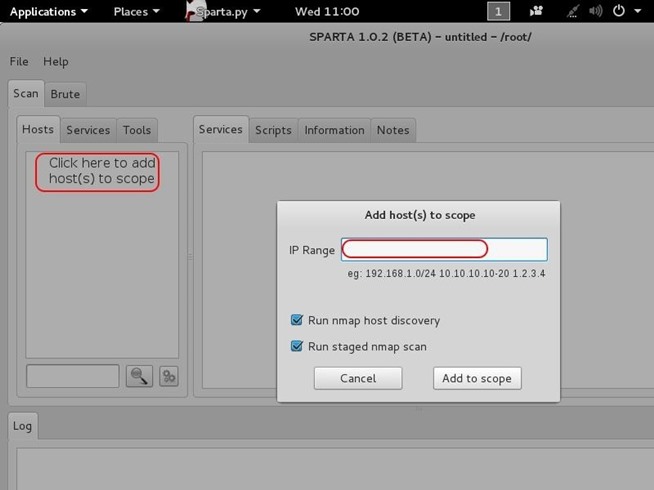
After adding our IP host range in the Window, click “Add to scope.” Sparta will start scanning your hosts now.
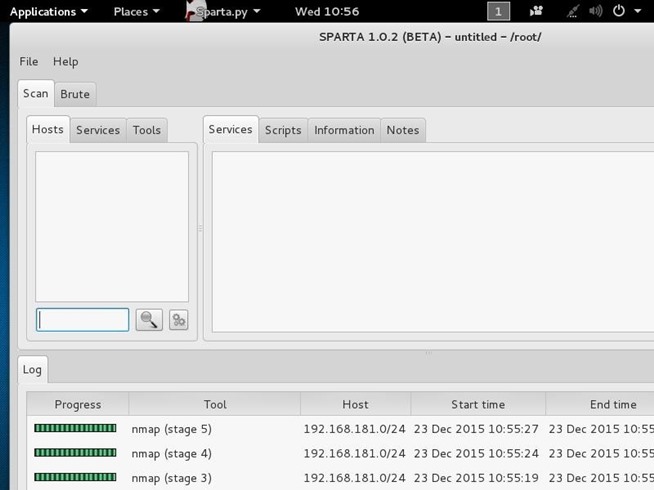
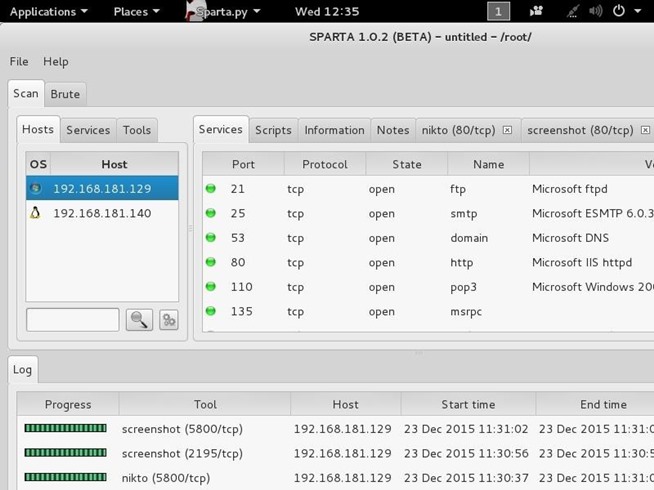
Step 3: Sparta Results
When Sparta is done scanning, it will provide you results like that below. My subnet had only two machines on it. As you can see, Sparta identified those two IP addresses and provided OS fingerprinting, identifying one as Linux and one as Windows. When I highlight the Windows system IP, it provides details of all the ports it found open and the services running.
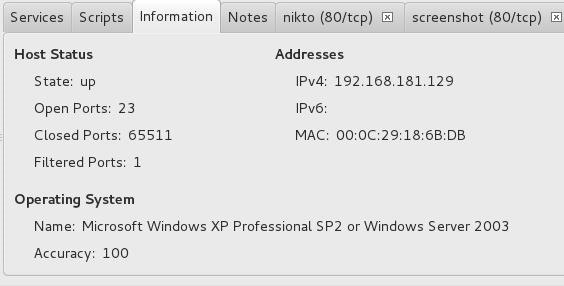
Step 4: More Information
If we go the “Information” tab, we can get more detailed information on the particular highlighted system. Notice at the bottom of this screen that we get more specific information on the operating system of the target.
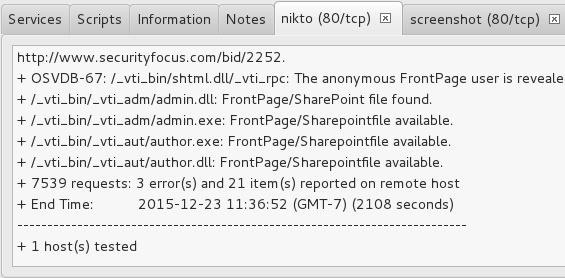
Interestingly, Sparta also runs a Nikto scan on the system if it finds port 80 open. We can click on the “nikto” tab to see results of the nikto web app vulnerability scan.
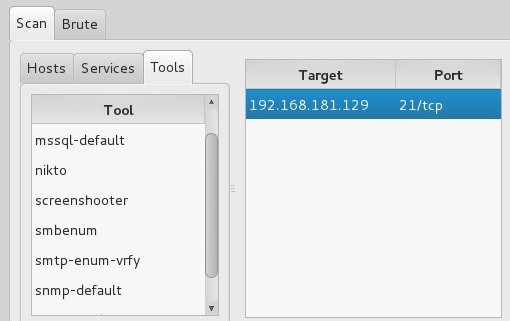
Step 5: Tools
One of the beauties of Sparta is that it integrates so many tools into this one single GUI. When we click on the “Tools” tab, Sparta displays numerous tools that we can apply to this target system including:
- Mysql-default
- Nikto
- Snmp-enum
- Smtp-enum-vrfy
- Snmp-default
- Snmp-check
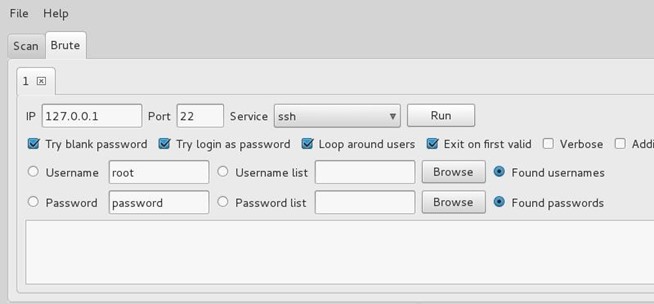
Step 6: Brute-Force Passwords
Sparta can also brute-force passwords. Using Hydra, you can specify the IP, port, and service, then brute-force it.
For those who want a single scanning and enumeration tool with an easy-to-use GUI, Sparta is the perfect reconnaissance tool.
In this tutorial, I introduced you to the basics of this tool, but because it integrates so many tools into one, it will require additional tutorials to demonstrate all its capabilities. On the other hand, because it is relatively intuitive, many of you should be able to decipher its capabilities by just playing with it a bit. In any case, Sparta is one more excellent tool in our reconnaissance toolset.
Keep coming back, my novice hackers, as we explore the tools and techniques of the most important skill set of the 21st century—hacking!
Source:https://null-byte.wonderhowto.com/


Working as a cyber security solutions architect, Alisa focuses on application and network security. Before joining us she held a cyber security researcher positions within a variety of cyber security start-ups. She also experience in different industry domains like finance, healthcare and consumer products.