
 Domain Name Server or we can say Domain Name System is a distributed method that helps humans to remember name of any website. Generally websites are hosted on servers using their IP Address. Humans cannot remember IP Address (numbers) all the time. That’s where DNS helps. DNS make any IP Address into normal text so anyone can remember the address of any website, in accordance to ethical hacking specialists.
DNS acts like an Address book for the internet. If you know any particular address name but don’t know their IP Address you can easily look it up in the address book. DNS works the same way, ethical hacking teachers assure.
For Instance it can be taken if user visits (webimprints.com) in a browser, computer will use DNS to receive the website IP Address which is 23.229.216.201.
DNS RECORD TYPES:-
DNS record types are generally used by DNS editor (Network Admins) who make changes in Domain Name Server.
- A – SHOWS HOST IP ADDRESS
- MX – SHOWS TO DOMAIN MAIL SERVER
- NS – SHOWS HOST NAME SERVER
- rDNS – SHOWS REVERSE DNS LOOKUP
- VIEW ANY FILE – MOSTLY USED IN BULD DNS LOOKUPS.
- PORT NO. – SPECIFYING THE PORT NUMBER.
- DNS PATH – SHOWING THE DNS PATH.
- IPV4/IPV6 – SHOW IN THE IP ADDRESSES.
- SOA- SHOWS THE SOA RECORD.
The above mentioned DNS record types are commonly used to gather information about the website, ethical hacking consultants clarifie.
NOW THE DIG:-
DIG is used to figure out whether DNS record are configured properly or not.
By default Dig is available for Kali linux.
- To start using dig, go to linux terminal. By simply typing dig webimprints.com
- Type dig in the Linux Terminal as shown in screen shot below:
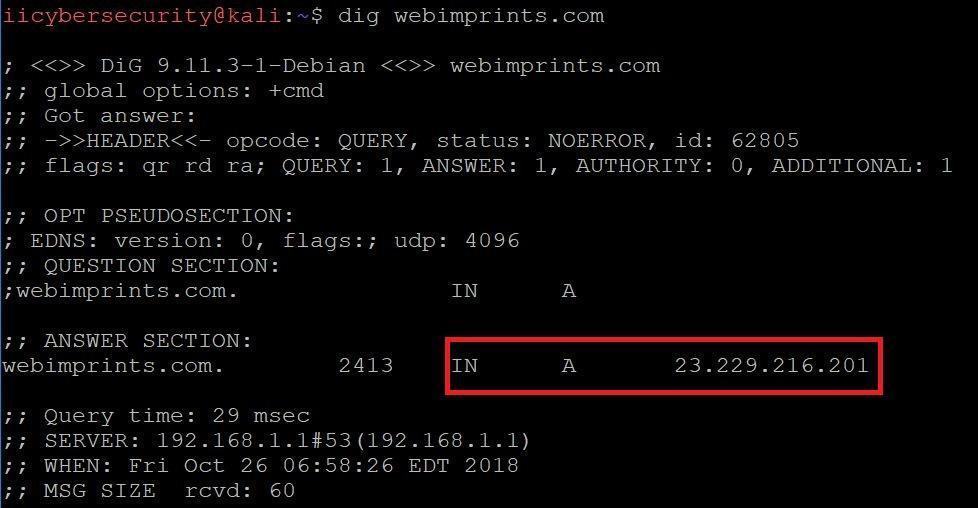
- In the output screen you can see that webimprints.com showing the IP address using A record.
TO CHECK YOUR DNS SERVER IN LINUX:-
- Type cat /etc/resolv.conf.
- You can see below the default configured DNS configures.

SPECIFYING NAME SERVER:-
- After above command type dig @192.168.1.1 webimprints.com
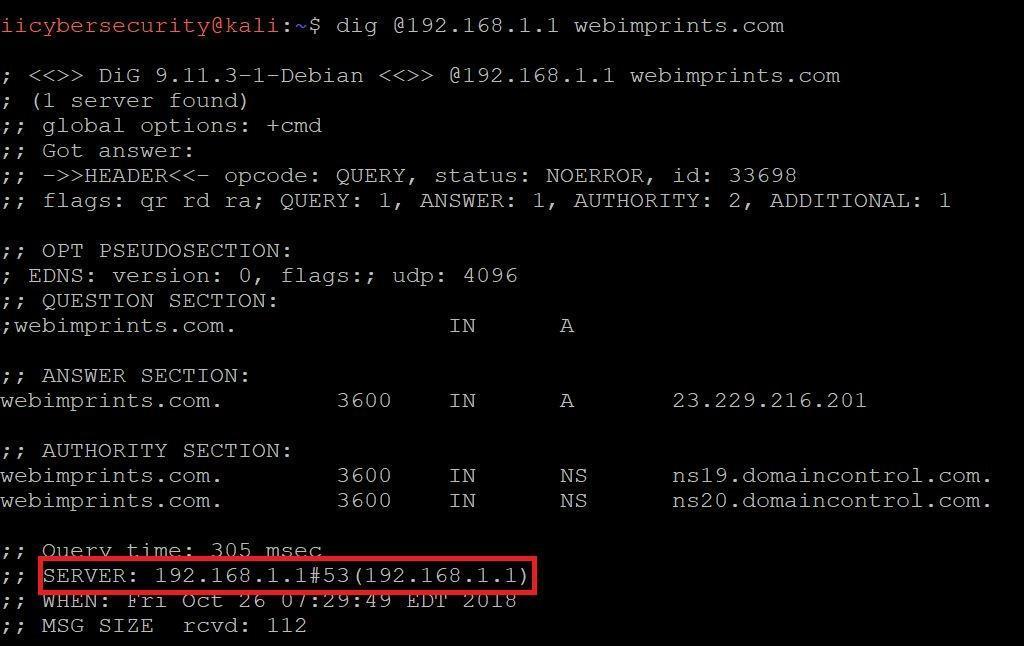
- In the above output we can see specified name server. At rooting level there should be some trustworthy name server configured to respond to queries against a domain name.
- NS which have been designated by registrar carries zone file for domain. Subdomain are configured in name servers.
SHOWING DOMAIN MAIL SERVERS:-
- Type dig @192.168.1.1 webimprints.com MX
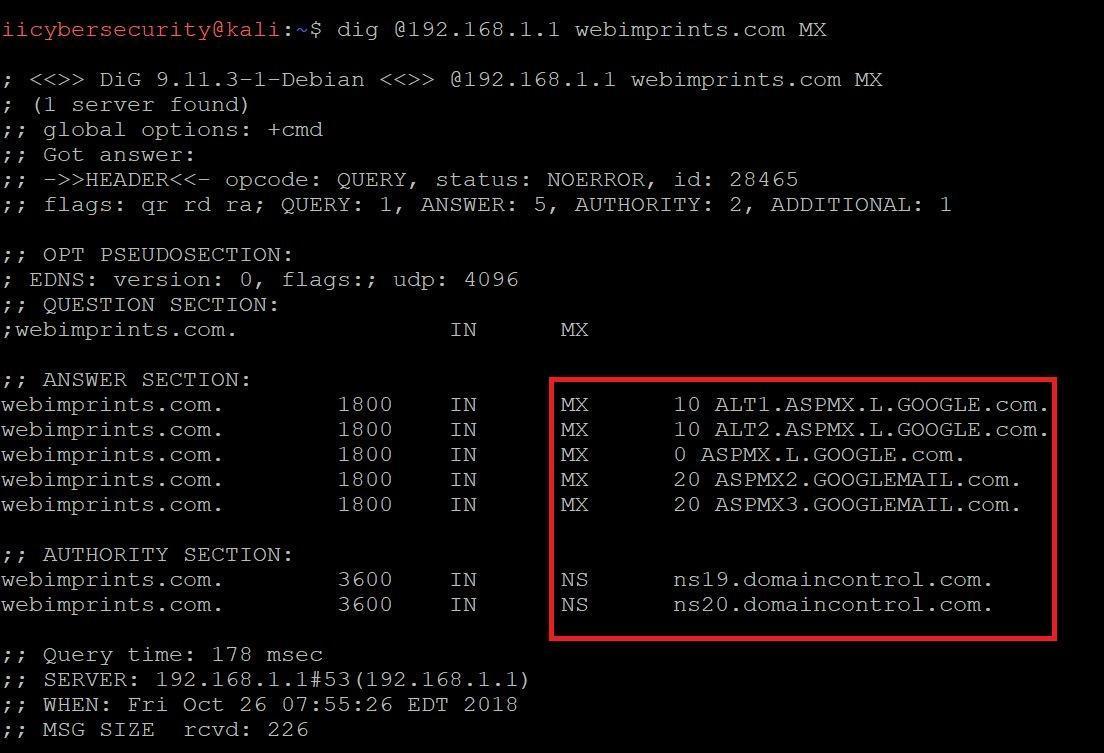
- In the above screen shot you see webimprints.com mail server. This MX record means that website of webimprints.com is having mail exchange record.
- Each MX record have its own preference and the lower numbers have a higher preference. So when mail is sent is uses MX record with the lowest preference, if lowest preference MX record is not reachable than MX record with the next high preference will be used. However if the records have same value MX preference, both MX records will be used simultaneously.
SHOWING REVERSE DNS LOOKUP:-
Type dig –x 23.229.216.201 (IP address)
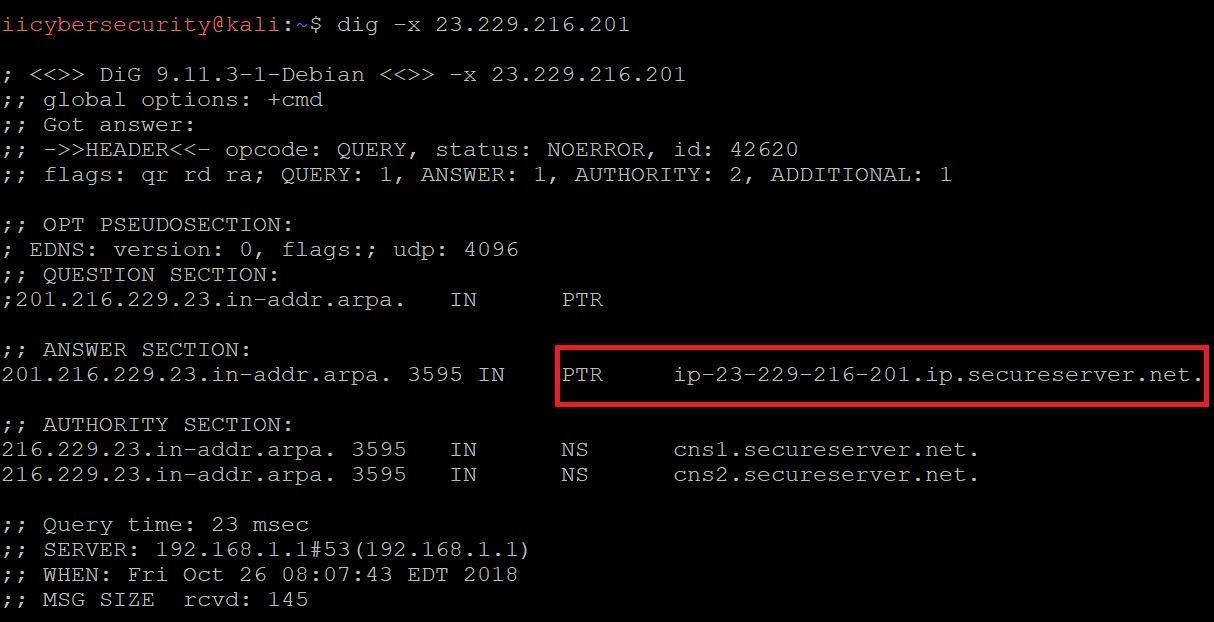
- PTR record allows rDNS query to match IP address to a domain. It works opposite to an A record.
- PTR record allows RDNS (Reverse DNS) query, to match IP address to a domain. It works opposite to an A (Address) record. Take for example 2 hosts:
- For 172.16.0.1:
Type: PTR
Host: 1
Points to: host1.example.com
- For 172.16.0.2:
Type: PTR
Host: 2
Points to: host2.example.com
The PTR records will be shown in Control Panel like this:
| Host | Type | Point-To | TTL |
| 1.0.16.172.in-addr.arpa | PTR | host1.example.com | 1 Hour |
| 1.0.16.172.in-addr.arpa | PTR | host1.example.com | 1 Hour |
- After PTR record, always make sure that the hosts mentioned should have A records. In above example, host1.example.com should have A record pointed to 172.16.0.1 and host2.example.com with 172.16.0.2
VIEWING A FILE:-
Type dig –f query.txt +short.

- You have to create any file. In that file you can enter any domain name. This command is useful in bulk DNS lookups.
- –f is used in reading the file. +short is used to only see the IP addresses.
INDICATE ANY PORT NUMBER:-
Type dig @8.8.8.8 –p 21 webimprints.com

- In the above screenshot, you can specify an alternate port. For some reason an external name server is configured for non-standard port.
- External name server actually listening to traffic on port (21) specified, and its firewall also need to allow the traffic, otherwise lookup will fail. As you can see the connection time out because 8.8.8.8 is not configured on random port which is 21 as above in screenshot.
DNS TRACING:-
- Type dig @8.8.8.8 webimprints.com +trace
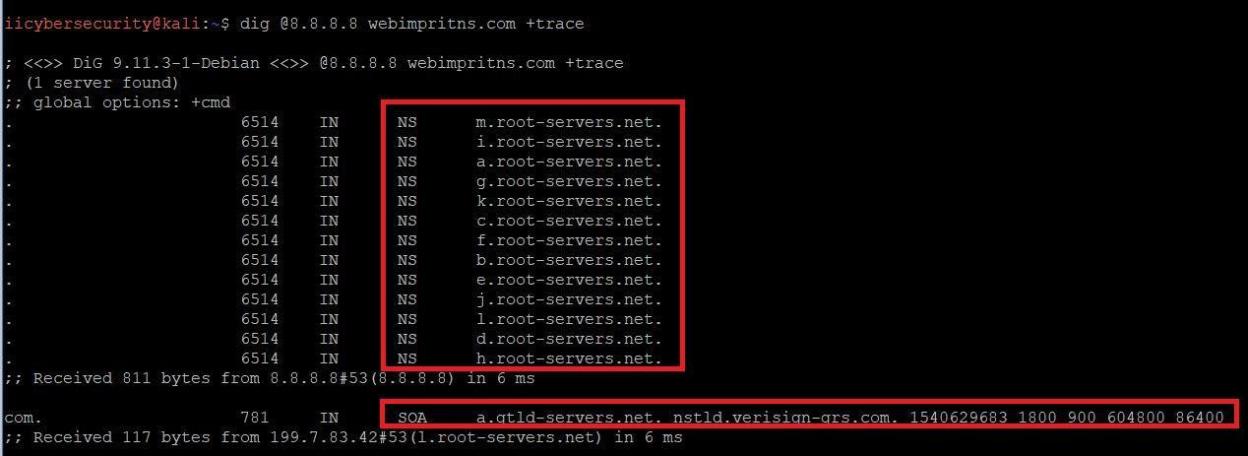
- In the above screen shot, querying webimprints.com you can see how DNS make its path. First it will go to root name servers, then .com domain.
USING IPV4 OR IPV6:-
- Type dig @8.8.8.8 -4 webimprints.com.
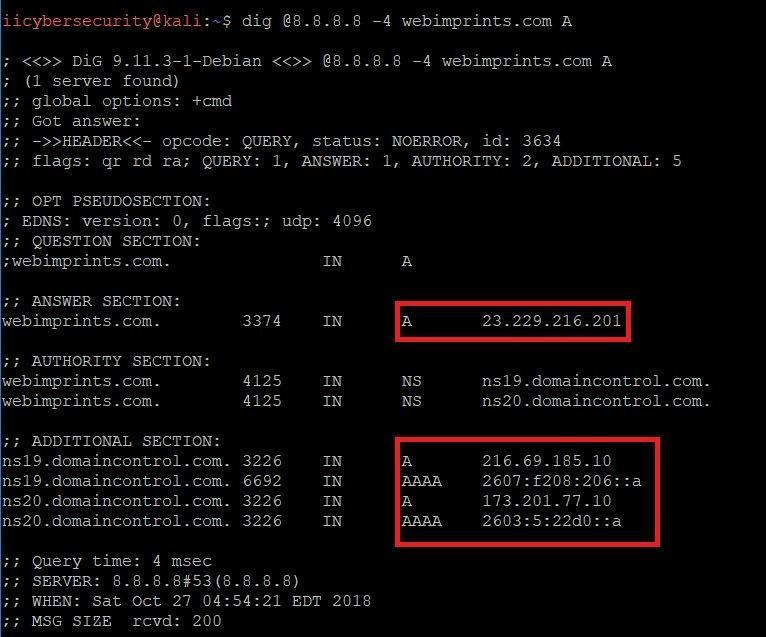
- In the above screen shot, using the ipv4 query to get the ipv4. If you want to query ipv6 you can -6 instead -4.
- If you want to see the ipv6 you have to configure ipv6 network to work correctly.
GETTING THE SOA:-
- Type dig @8.8.8.8 webimprints.com SOA.
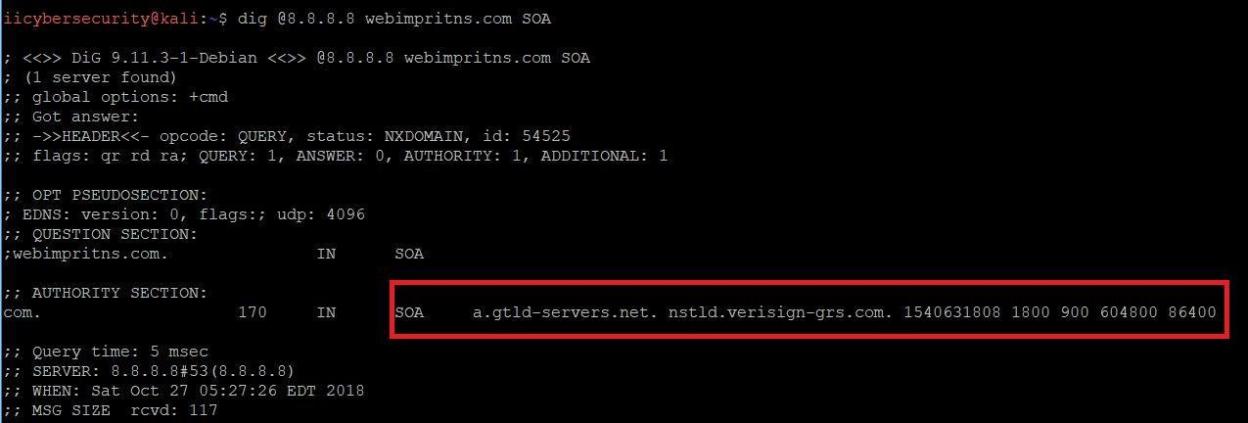
- In the above screen shot, using the query SOA(State of authority) shows simple information about the domain like, how often it is updated, when it was last updated. A zone file can contain only one SOA record.
As per ethical hacking researcher of international institute of cyber security, dig is quite helpful for network administrator in information gathering phase.


Cyber Security Researcher. Information security specialist, currently working as risk infrastructure specialist & investigator. He is a cyber-security researcher with over 25 years of experience. He has served with the Intelligence Agency as a Senior Intelligence Officer. He has also worked with Google and Citrix in development of cyber security solutions. He has aided the government and many federal agencies in thwarting many cyber crimes. He has been writing for us in his free time since last 5 years.


