
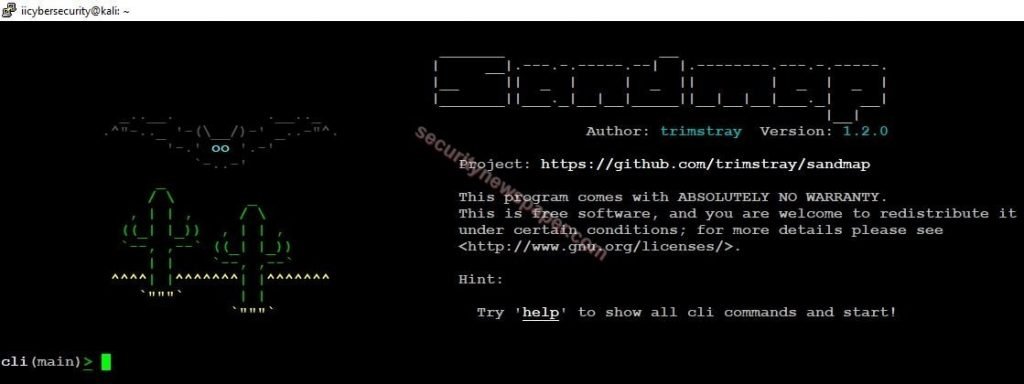
Introduction
While doing Penetration Testing we always have to run the basic Nmap scan to find services running on remote host. Nmap is a small world of tools in itself, there are so many options and modules in Nmap that sometimes it is very difficult to remember all of them. Even the researcher of International Institute of Cyber Security has automated many task required during pentesting phases.
So today we will talk about a tool called Sandmap. It is a network scanning tool, we can scan any network easily using massive Nmap Engine. This application is simple and easy to use, it has 31 modules & 495 scanning profiles. This tool provides user-friendly interface.
Environment
- OS: Kali Linux 2020
- Kernel version: 5.6.0
Installation Steps
- Use this command to clone the file.
- git clone https://github.com/trimstray/sandmap
root@kali:/home/iicybersecurity# git clone https://github.com/trimstray/sandmap
Cloning into 'sandmap'...
remote: Enumerating objects: 2697, done.
remote: Total 2697 (delta 0), reused 0 (delta 0), pack-reused 2697
Receiving objects: 100% (2697/2697), 15.96 MiB | 550.00 KiB/s, done.
Resolving deltas: 100% (1842/1842), done.
- Use cd command to enter into sandmap directory
root@kali:/home/iicybersecurity# cd sandmap/
root@kali:/home/iicybersecurity/sandmap#
- Now, use this command to launch the tool. “Sandbox”
- Type “help” to find the options.
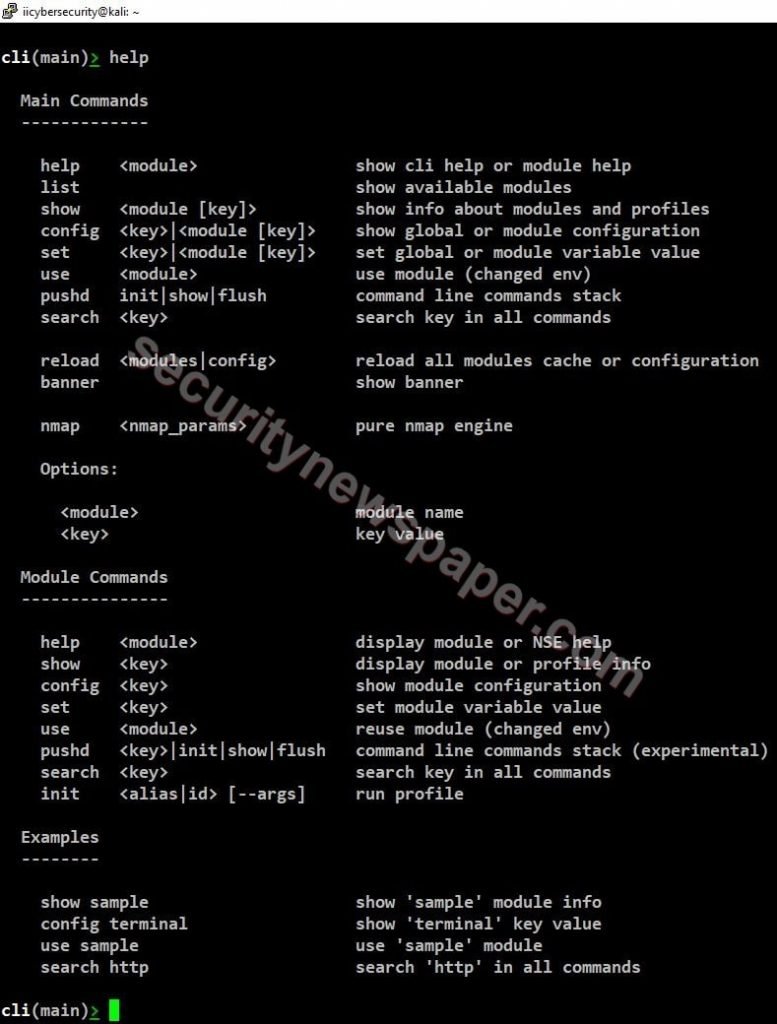
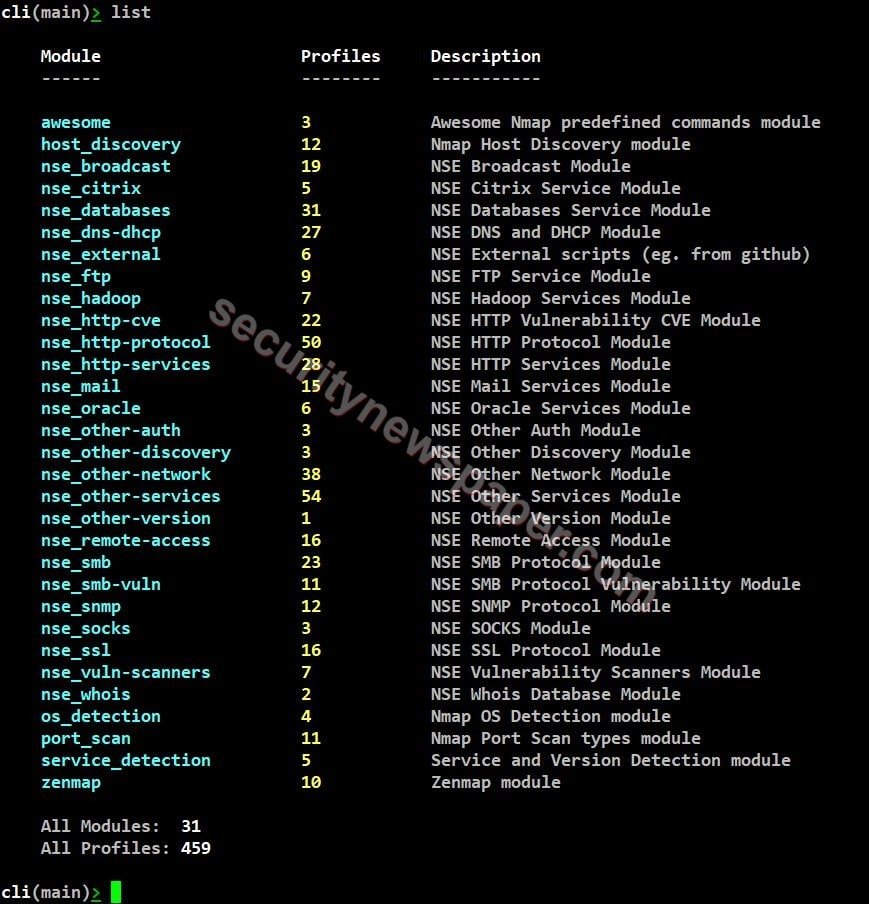
- Type “list” to view all the modules
- Type “use” command to select any particular module. “use <module name>”
- Port scan: port scan is used to list out all the open ports on a particular IP address
- Next, set the target IP address which we want to scan, use this command “set dest <IP address>”.
- Now, use “init” command to perform the scan. “init <ID or Alias>”.
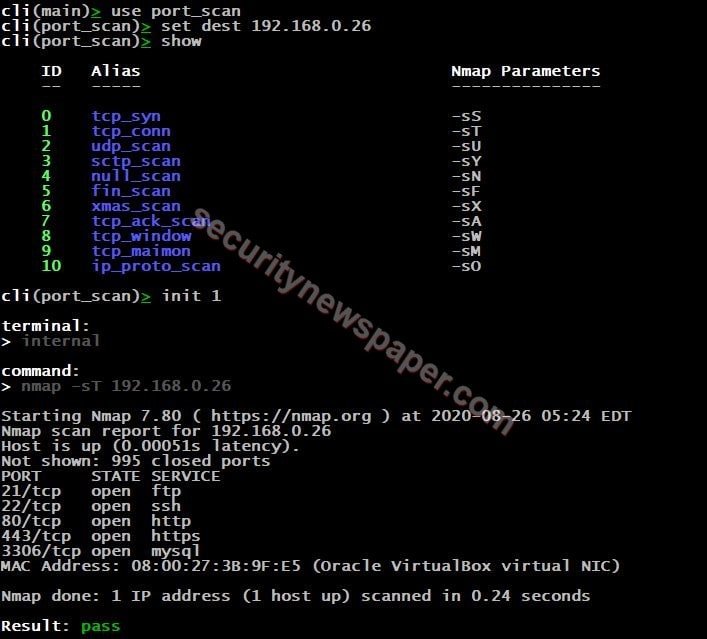
- Successfully got the open ports
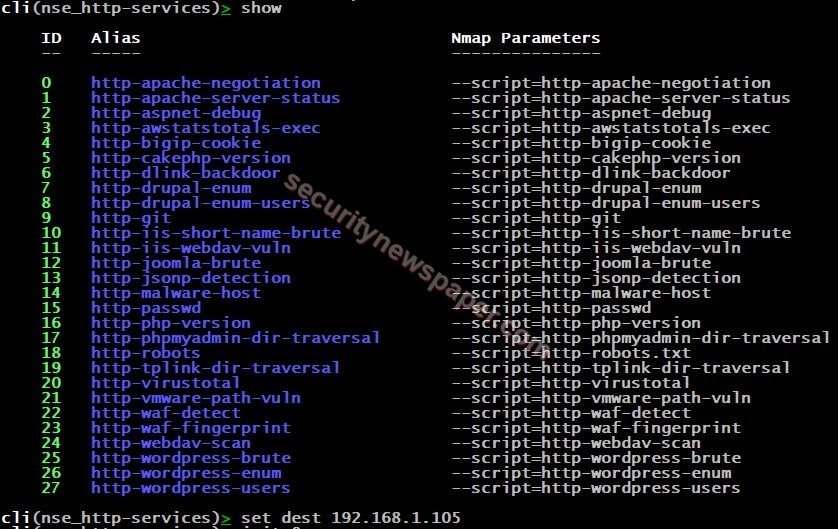
HTTP Services
- Type “use” command to select any particular module. “use <module name>”
- After selecting the module, type “show” to view the modules of http-services.
WAF Detection: WAF (web application firewall) detection, it protects the application from the attackers and it also filters, monitors the traffic.
- To perform this step, we have started the “DVWA”, it a web application testing OS.
- Use DVWA IP as a target, then start scanning.
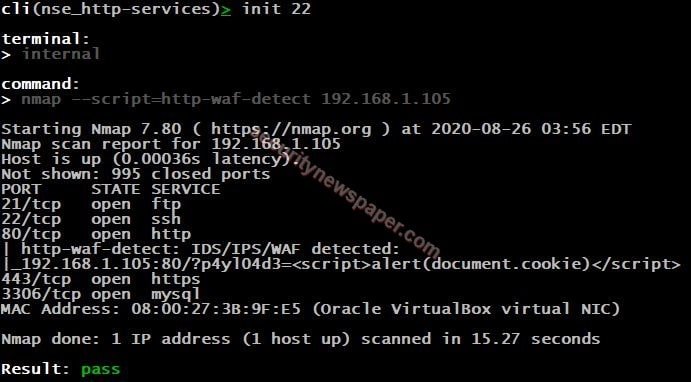
- Successfully detected the WAF with open ports.
Zenmap
- Type “use” command to select any particular module. “use <module name>”
- After selecting the module, type “show” to view zenmap modules

- Set the target IP address by using “set dest <IP address>”
- Intense Scan: Intense scan is used to find out the OS detection, version detection, script scanning and traceroute. Detection can be done by monitoring the response where we send TCP/UDP packets, this can be done with stack fingerprinting.
- Next, use “init ID or Alias” to start scanning
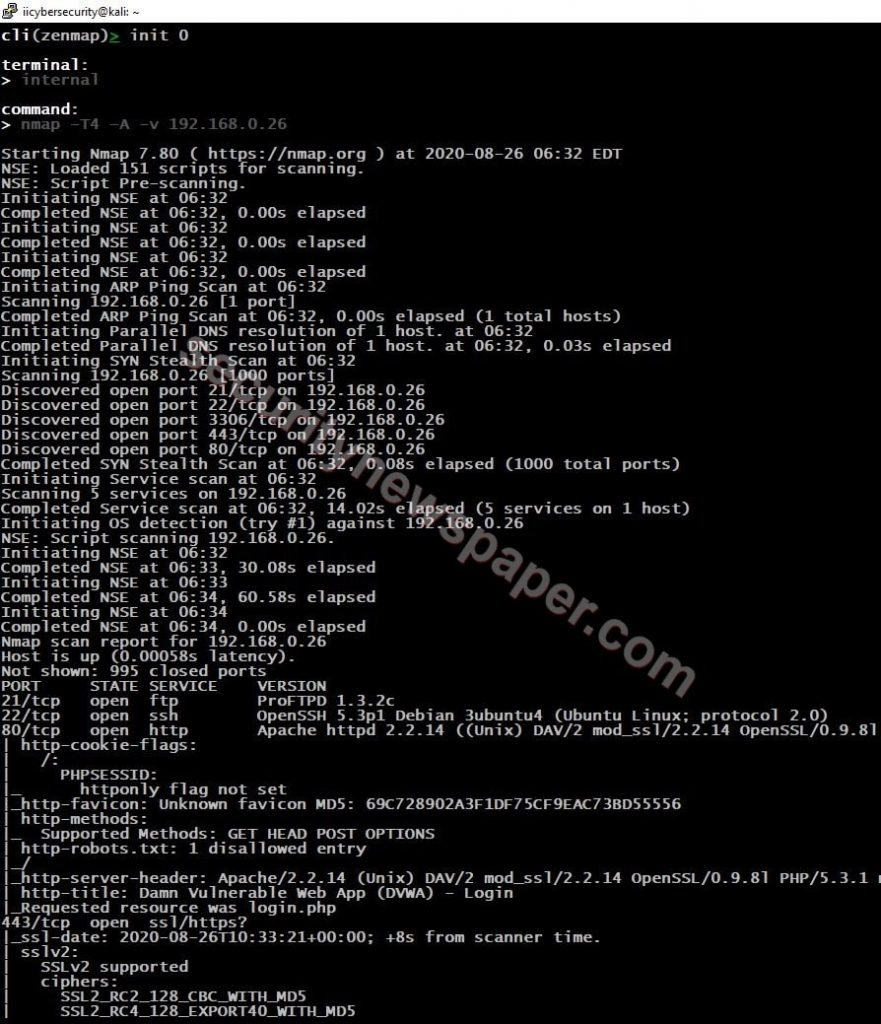
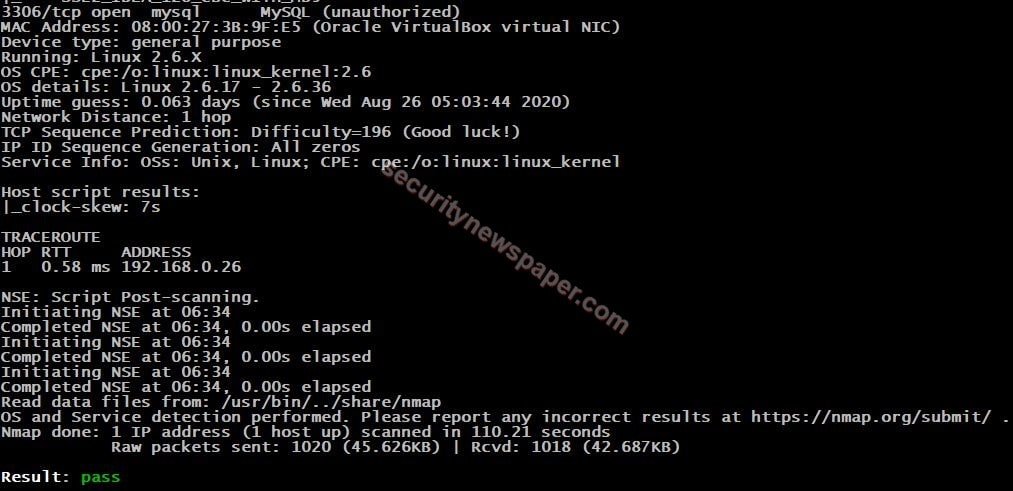
- Successfully got the information about the target.
Conclusion
We saw on how we scanned a host by selecting a particular module and we can say that this tool is an advanced Network mapping engine.


Cyber Security Specialist with 18+ years of industry experience . Worked on the projects with AT&T, Citrix, Google, Conexant, IPolicy Networks (Tech Mahindra) and HFCL. Constantly keeping world update on the happening in Cyber Security Area.


