
Microsoft released Cumulative Update 11 (CU11) on September 28, 2021. It also released two new Security Updates for Exchange Server 2019 CU11 in October and November 2021, containing all previous hotfixes and patches to fix Exchange Server security and non-security issues.
If your organization is running an older Exchange Server 2019 build, it is highly recommended to update the server with the latest Cumulative Update to continue receiving the latest Security Updates (SUs).
Microsoft currently supports and releases new Security Updates for Exchange Server 2019 CU10 and CU11 builds. It does not provide any support or Security Updates and hotfixes for an unsupported Exchange Server running on an older version or unsupported CU.
Moreover, updating Exchange Server 2019 to the latest CU build patches the server against various known threats. It protects your organization from ongoing malicious attacks by various state-sponsored and financially motivated threat actors.
In this article, you will learn steps to update Exchange Server 2019 to CU11 and install the latest Security Updates.
Steps to Install Exchange Server 2019 CU11 Update
Follow these steps to install Exchange Server 2019 Cumulative Update 11 and the latest Security Updates.
NOTE: Save all customized Exchange and IIS settings (if any) as they may get overwritten after the update.
Step 1: Download the Exchange Server 2019 CU11 Build
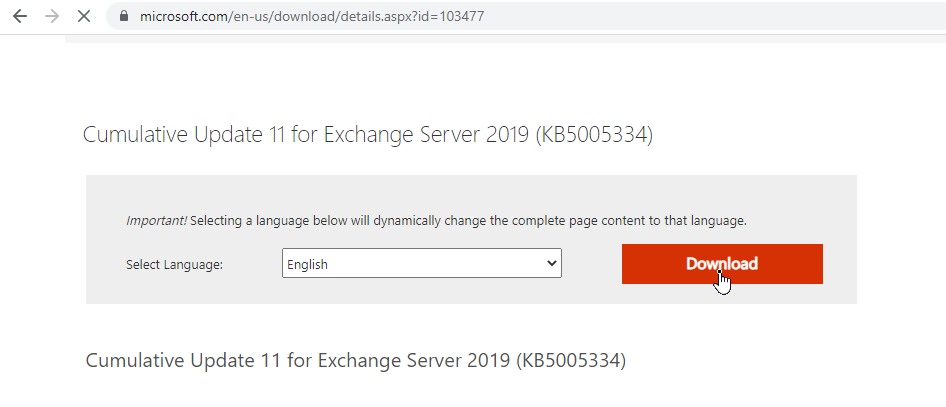
Visit this Exchange Server build number and release dates page to download the Exchange Server 2019 CU11 update released on September 28, 2021.
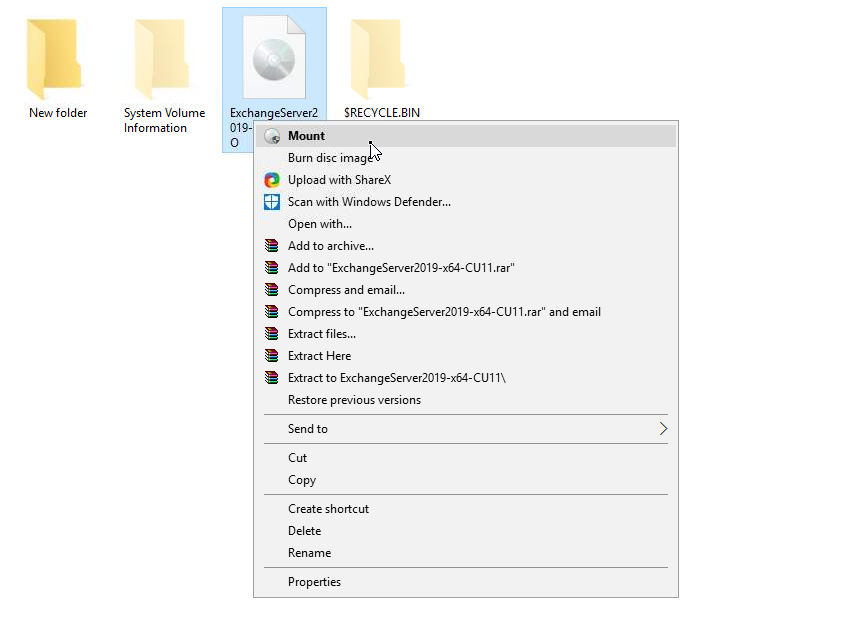
After the download, extract the ISO file. You may also mount the ISO file using double-click or Right-click on ISO and choose the Mount option.
Step 2: Install Pre-Requisites
Exchange Server 2019 CU11 requires .NET Framework 4.8 and IIS URL rewrite module installed on the server before you start installing the CU11 update.
The IIS URL Rewrite module is required for Microsoft Exchange Emergency Mitigation Service introduced with Exchange Server 2019 CU11 update. After the installation, reboot the server.
Step 3: Put the Exchange Server in Maintenance Mode
Before starting the Exchange Server 2019 update process, it’s critical to put the server 2019 in maintenance mode. The steps are as follow,
- Open Exchange Management Shell as administrator and then execute the following command to set the HubTransport component in the draining state.
Set-ServerComponentState -Identity “ExchangeServerName” -Component HubTransport -State Draining -Requester Maintenance
- Then put the Exchange Server 2019 into maintenance mode.
Set-ServerComponentState “ExchangeServerName” -Component ServerWideOffline -State Inactive -Requester Maintenance

- Verify maintenance mode by executing the following command,
Get-ServerComponentState -Identity “ExchangeServerName”

Step 4: Prepare Exchange Server 2019 for CU11 Update
You also need to update the Active Directory, Schema, and all Domains using the CU11 binaries. The steps are as follow,
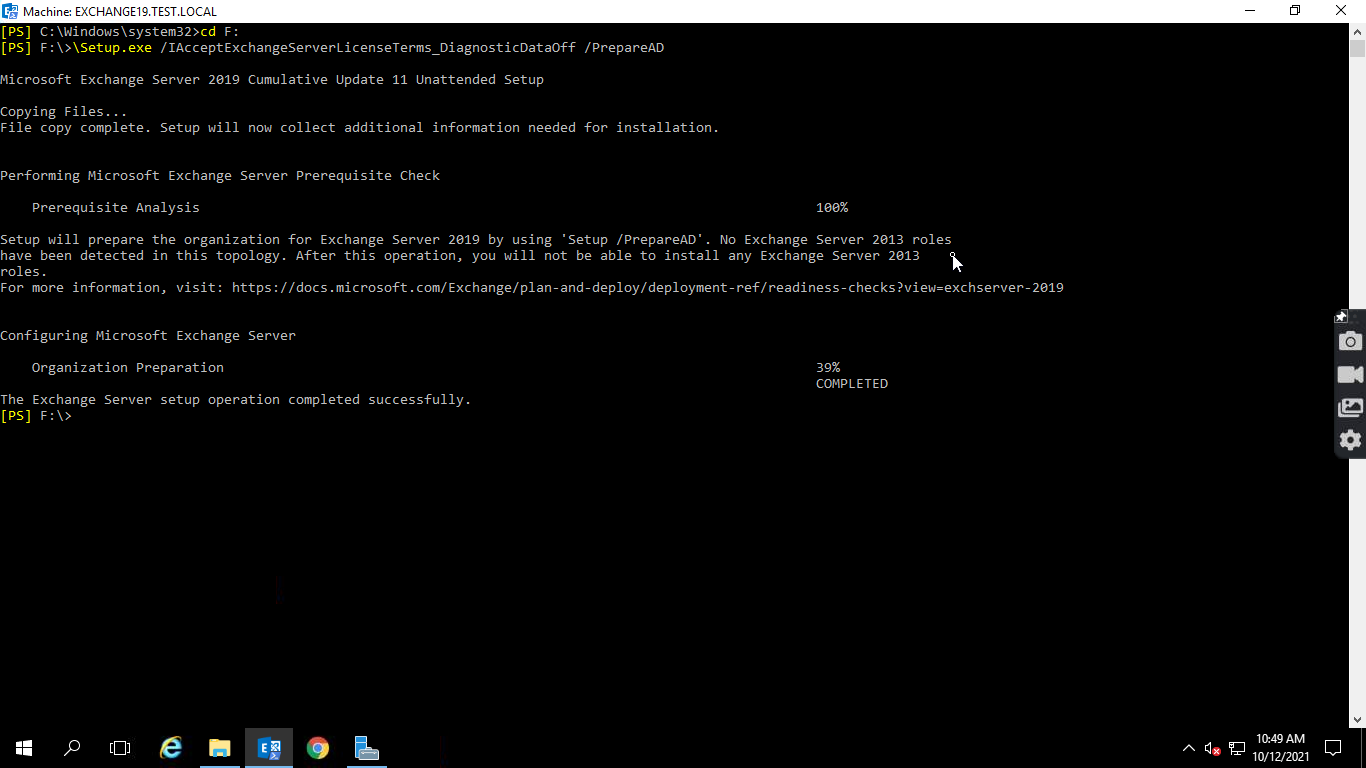
- Open Command Prompt as administrator and navigate the Exchange Server 2019 CU11 ISO mount location using the ‘cd‘ command. For example,
cd F:
- Then run the following commands to prepare the Schema, AD, and Domains.
\Setup.exe /IAcceptExchangeServerLicenseTerms_DiagnosticDataOff /PrepareSchema
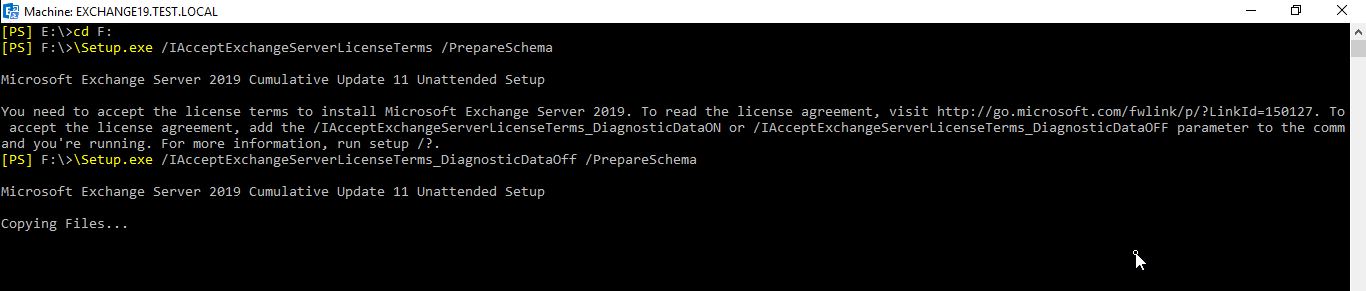
\Setup.exe /IAcceptExchangeServerLicenseTerms_DiagnosticDataOff /PrepareAD
\Setup.exe /IAcceptExchangeServerLicenseTerms_DiagnosticDataOff /PrepareAllDomains
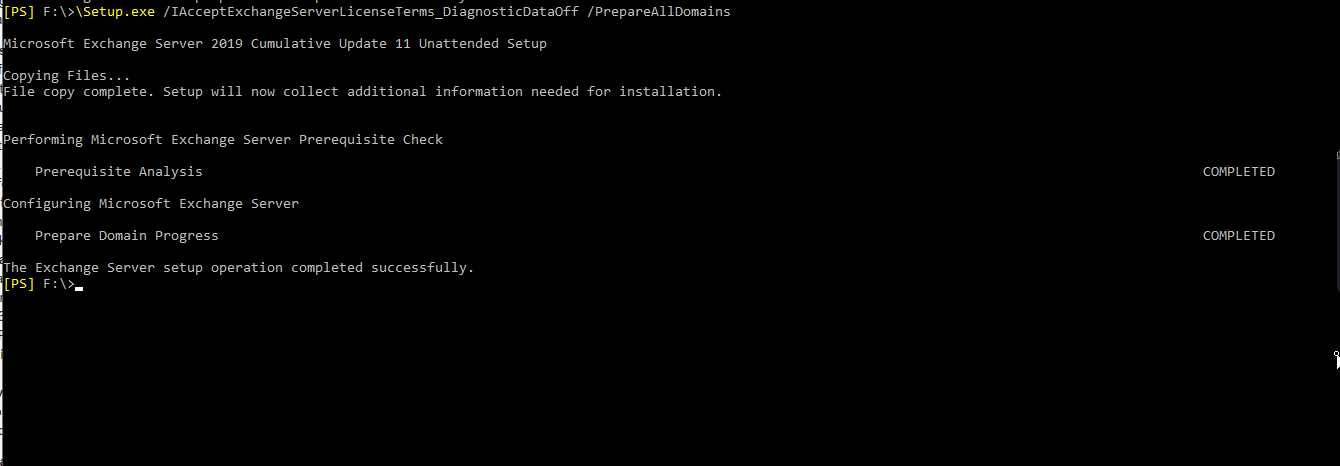
After updating the Active Directory, Schema and Domains, reboot the server.
Step 5: Install Exchange Server 2019 CU11
Launch the Setup.exe file and follow the installation wizard to install the CU11 update using the GUI.
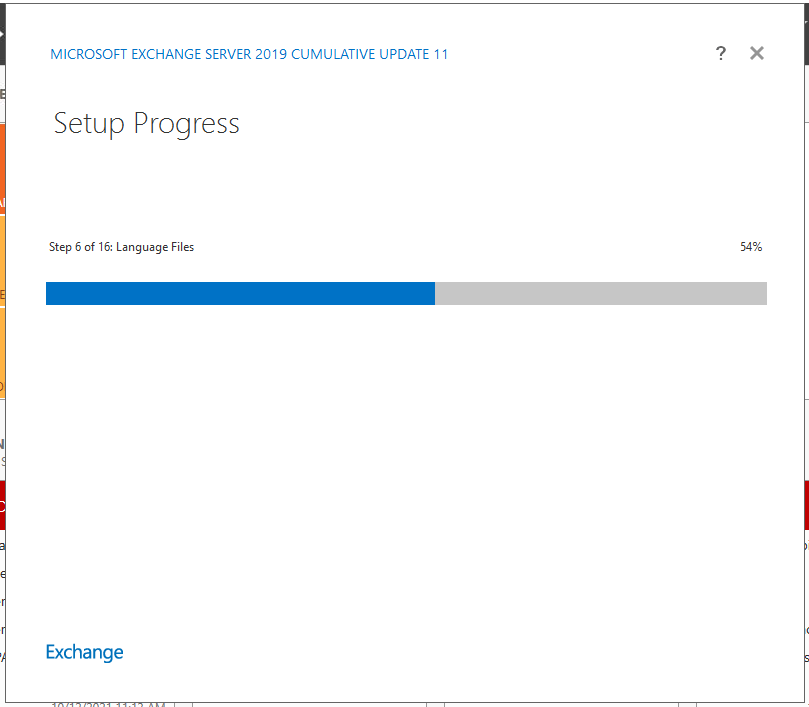
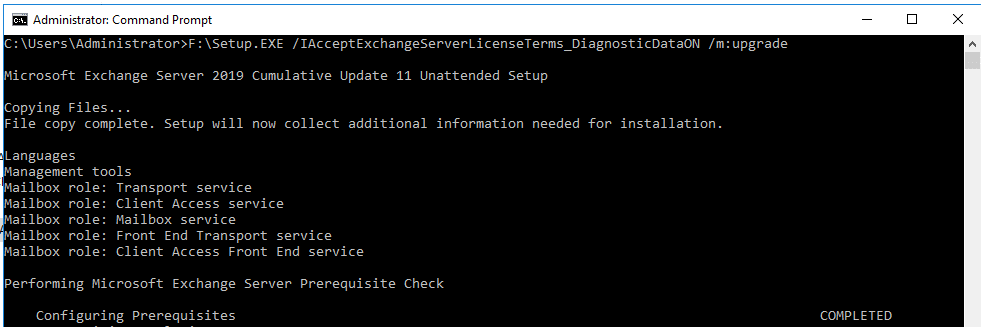
You may also run the Setup.exe in unattended mode using elevated Command Prompt to install the CU11 update on your Exchange Server 2019.
In this guide, we will run the Setup.exe and install the CU11 update on Exchange Server 2019 in unattended mode. The steps are as follow,
- In the elevated Command Prompt window, execute the following command to begin the CU11 update.
<ISOMountDriveLetter>\setup.exe /IAcceptExchangeServerLicenseTerms_DiagnosticDataON /m:upgrade
For example,
F:\setup.exe /IAcceptExchangeServerLicenseTerms_DiagnosticDataON /m:upgrade
- Restart the server.
After the reboot, you can reimport your saved customizations.
Step 6: Turn Off the Maintenance Mode
After the successful CU11 installation, you must remove the Exchange Server 2019 from maintenance mode using the following command,
Set-ServerComponentState “ExchangeServerName” –Component ServerWideOffline –State Active –Requester Maintenance
Set-ServerComponentState “ExchangeServerName” –Component HubTransport –State Active –Requester Maintenance

To verify that the server is out of maintenance mode, run the following command.
Get-ServerComponentState –Identity “ExchangeServerName”
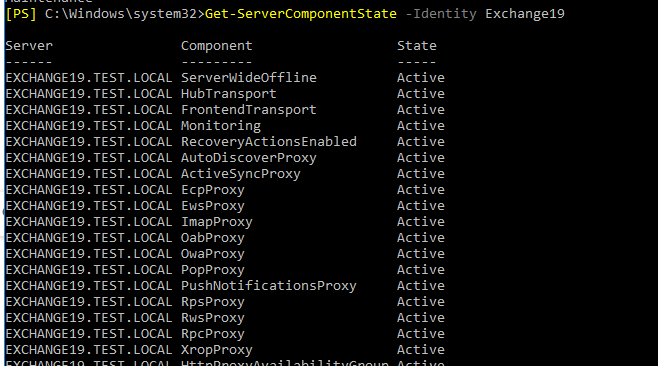
The output should display the Component status as ‘Active‘. If a certain component is still inactive, run the following command to activate.
Set-ServerComponentState “ExchangeServerName” –Component “ComponentName” –State Active –Requester Maintenance
Then restart the server.
Step 7: Install Latest Security Updates Available for CU11
Microsoft has released Security Update 2 (KB5007409) for Exchange Server 2019 CU11 on November 8, 2021. It also contains patches and fixes released with October 2021 Security update.
Download the Security Updates and follow these steps to install them,
- Open the Command Prompt as administrator and navigate where you downloaded the Security Update.
cd C:\Users\Administrator\Downloads\
- Then run following command to install the Security Updates,
.\UpdateFileName.msp
For instance,
.\Exchange2019-KB5007409-x64-en.msp

- Click ‘Open‘ and then follow the installation wizard to install the Security Updates.

After installing the Security Update, restart the server.
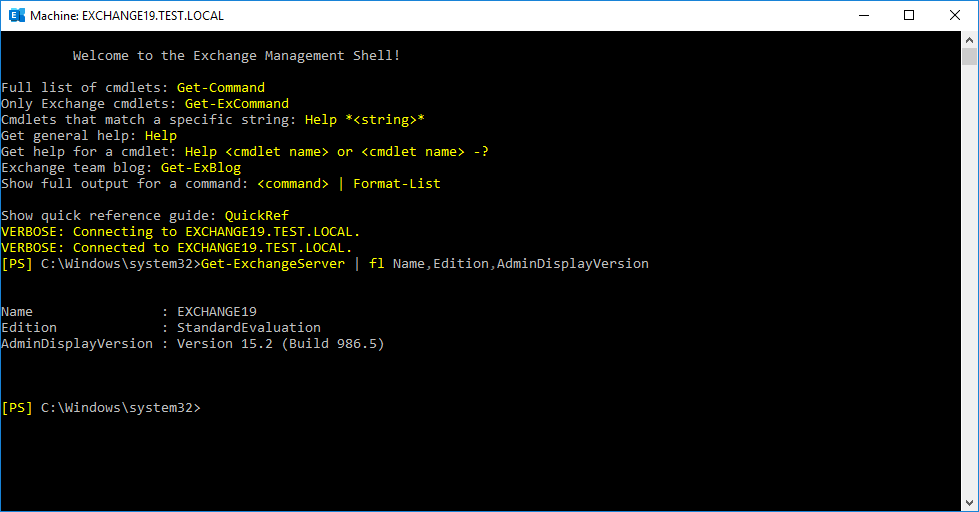
Step 8: Check If the Exchange Server 2019 is Updated
Open EMS and run the following command to check the Exchange Server 2019 build number. If it shows Version 15.2 (Build 986.5), the server is successfully updated to CU11.
Get-ExchangeServer | fl Name,Edition,AdminDisplayVersion
To verify if November 2021 Security Update for Exchange Server 2019 is also installed, go to Control Panel> Programs> Programs and Features and click View installed updates.

The Exchange Server 2019 is successfully upgraded to CU11 with November 2021 Security Update (KB5007409).
You may refer to this guide for installing upcoming CUs and SUs on Exchange Server 2019.
Bonus Tip
We highly recommend you to run HealthChecker.ps1—a PowerShell script before and after installing the CUs or SUs on your Exchange Server. The script helps identify issues and vulnerabilities on the server. You can use it to check the server’s overall health and resolve identified issues to avoid problems and ensure consistent performance.
- To run the script, download HealthChecker.ps1 and then open Command Prompt as administrator
- In the command prompt, navigate to the location where the script is located using the cd command and then run the following command,
.\HealthChecker.ps1 –BuildHtmlServersReport
- This generates a detailed HTML report at the same location where the script is located.

You can view this HTML report in any web browser to check the server’s health and fix the issues, if any.
To Wrap Up
We hope this helps you update your Exchange Server 2019 to the latest Cumulative Update 11 and successfully install November 2021 Security Updates. It’s recommended to test any new updates on a test Exchange Server before deploying them to your production server. This will help find any issues and fix them before deploying them to your production server. However, if problems occur during or after the CU or SU installation, please refer to repair failed installations of Exchange Cumulative and Security updates.
If you can’t fix the server after a failed installation, it can render your server unusable, and you may require to set up an identical server and restore the mailboxes. In such situations, backups come in handy. However, if backups are not available or obsolete, you can use Exchange EDB recovery software, such as Stellar Repair for Exchange, to recover mailboxes from failed servers’ databases and export them to your newly set up Exchange Server databases directly. For more help related to updating Exchange Server 2019 to CU11 or later versions, leave a comment below.


Information security specialist, currently working as risk infrastructure specialist & investigator.
15 years of experience in risk and control process, security audit support, business continuity design and support, workgroup management and information security standards.


