
Encrypting a hard drive is a great way to protect a computer’s data. This will set a password each time a user wants to access data in the same way that they sign in to an email platform or social media service.
This time, specialists from the International Institute of Cyber Security (IICS) will show you how to encrypt a hard drive and protect any actor’s data from threats. Encryption is good as the first line of defense, because if someone steals your laptop and manages to eject the hard drive you will be in trouble accessing the information. Encryption can also be implemented at folder and file level.
ENCRYPTION WITH WINDOWS SYSTEM TOOLS
BitLocker Device Encryption is Microsoft’s encryption tool built into Windows 10 Pro and Enterprise. Although it works, BitLocker has several disadvantages:
- If BitLocker was not pre-installed on your computer, installation and configuration can be difficult
- Bitlocker functions may differ on different devices; it all depends on your motherboard
- As mentioned above, BitLocker only works with Windows 10 Professional and Enterprise
Luckily there are several alternatives. VeraCrypt is an option that is not affected by the drawbacks of BitLocker:
- It’s much easier to install than BitLocker
- It’s independent of your computer’s hardware
- Works on any version of Windows 10
VeraCrypt is free and open source software that is also considered more secure by the cybersecurity community in general. After installing VeraCrypt, you will only need to enter your password each time you start your computer.
HOW TO INSTALL VERACRYPT
Installing VeraCrypt is a relatively complicated process and there is even the possibility of losing files if any step is done wrong. IICS specialists recommend careful reading the installation instructions before starting the process. If you do not feel sure to apply the process correctly, it is recommended to try to install the tool.
INSTALLATION ON WINDOWS 10
- You will need a USB stick to save VeraCrypt Emergency Disk Recovery. Take a USB stick and format it in FAT or FAT32 so it’s ready when you need it
- You will also need a program to unzip files
- Go to the VeraCrypt download page and search for the Windows installer
- Run the VeraCrypt installation, leave all items as default. In the first window, you can select the installation language
- After a while, the message “VeraCrypt was successfully installed”
- Click OK, and then click Finish to complete the installation. VeraCrypt will display a message as in the screenshot below
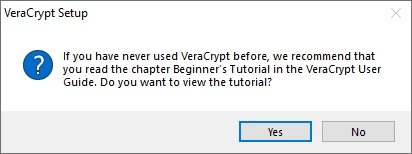
- If you have never used VeraCrypt, it is best to follow this tutorial. Click Yes to view the guide or No to skip. Anyway, we’ll show you the rest of the steps in this article
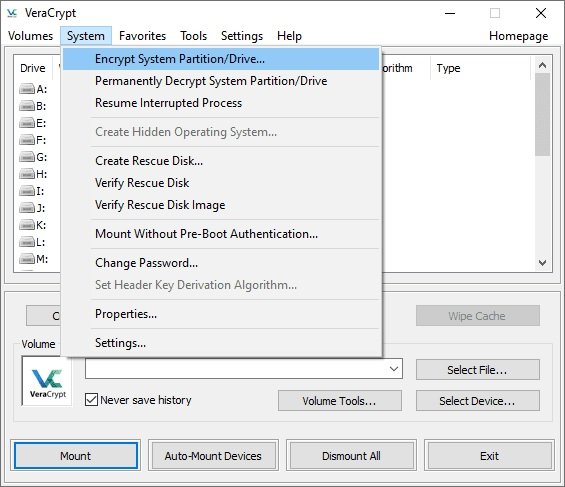
- Run VeraCrypt, then select the System menu, then Encrypt System Partition/Disk
- The “Veracrypt Volume Creation Wizard” window will then appear. You will need to choose the encryption type: NORMAL or HIDDEN. Normal only encrypts the entire system. This is what we want, so select that option
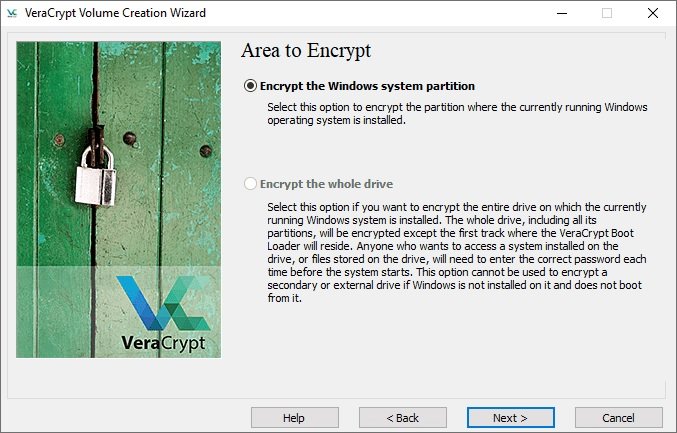
- The program will ask if only the Windows system partition or the entire drive should be encrypted. If you have multiple partitions with important data, you can encrypt the entire drive. If you only have one partition on disk (like us), there will be an option: “Encrypt windows system partition”. Select this item and click Next
- The next window is “Number of operating systems”. If you have multiple operating systems, choose Multiple Boot. Otherwise, choose Single Boot. Click Next”
- The encryption settings window will then appear. We recommend that you choose AES for encryption and SHA-256 for hashing. Both are widely used algorithms
- The next step will be to create a password. It is better to choose a reliable one to protect the system from any hacking attempt. Many password managers (such as Bitwarden) have tools to generate strong passwords automatically. VeraCrypt will alert you if your password is not secure enough
- The following is the collection of random data. You will need to move the mouse randomly within the window. This increases the strength of encryption keys. Once the indicator at the bottom of the window is full, proceed to the next step
- Then the “Generated Keys” window will appear. Here you just need to click on the “Next” button.
- You must then create a recovery disk. You can skip creating a physical recovery disk, but this is not a recommended measure. Note where the backup ZIP image will be stored, then click Next
- If you did not skip creating a recovery disk in the previous step, you will need to address it now. VeraCrypt doesn’t say how to do this, but we’ll explain it below. You will need to use the USB that was formed at the start of the process; insert it into your computer and navigate to the directory where VeraCrypt stores ZIP images. Use 7-zip (or any other decompression program) to extract the files from the “VeraCrypt Rescue Disk.zip” file to the root of your USB drive. When finished, click Next to have VeraCrypt verify that the copy is correct
- If all went well, you will see a chart mentioning “Verified Recovery Disk”. Remove the USB stick and go to the next step
- In the next step will appear is the cleaning mode window. Normally, there is nothing to do with this function. Make sure it’s set to No (faster) and click Next
- The System Encryption Pre-Test window appears. VeraCrypt will now check if encryption works on your system. The following image explains in detail what will happen. Click Test to see how this happens. Note that VeraCrypt will probably show you a few more and similar warnings before you actually run the test, so be prepared for that
- If everything went well, the computer will restart and you will see a window like the following screenshot

IICS experts recommend backing up all important files before starting this process. This will allow you to recover them if something serious happens in the middle of the encryption process, such as a blackout or system failure.
If you are completely sure that the process completed successfully, press ENCRYPT. VeraCrypt will show you some documents that you may want to print or save as PDF; this information is important so please do not ignore it.

If the encryption has been successful, remember that you will now need to enter your password each time you try to access the system.


Cyber Security Specialist with 18+ years of industry experience . Worked on the projects with AT&T, Citrix, Google, Conexant, IPolicy Networks (Tech Mahindra) and HFCL. Constantly keeping world update on the happening in Cyber Security Area.


