
We all use phones today and often share sensitive information across these devices, which can be attractive to hackers. This time the International Institute of Cyber Security (IICS) experts will show you how to craft a device to listen to conversations on fly in a room via a wiretapping GSM device using really simple components.
This process is truly simple and requires no knowledge of hacking or the use of advanced hardware components, as only a few parts of any conventional radio are needed.
Only some companies have government permits to manufacture these devices, and while in theory they should adhere to government requirements, developing these devices is so easy that anyone can purchase and use one.
There are several types of surveillance:
- Radio and SMS bugs
- Using mini voice recorders
- Hidden video cameras
- Using laser microphones
The method we will use this time is to develop a GSM bug, a powerful device and long battery life. Its features allow you to work in standby mode for up to ten days and listen to up to 4 hours of phone calls.
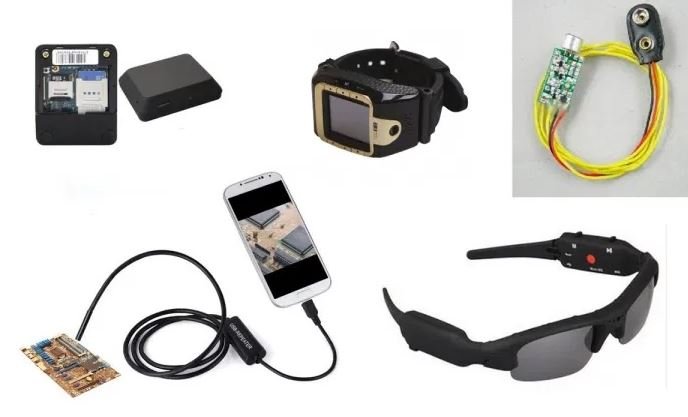
Hide wiretaps
The easiest way is to hide something in the most visible place, in something that doesn’t catch your eye. Below are some interesting ones to disguise your spying device.

These listening options are also interesting because the objects in which the bugs were introduced are almost always connected to the network: this way, the bug will never be down, which means that it will take longer to perform its function: transmit information.
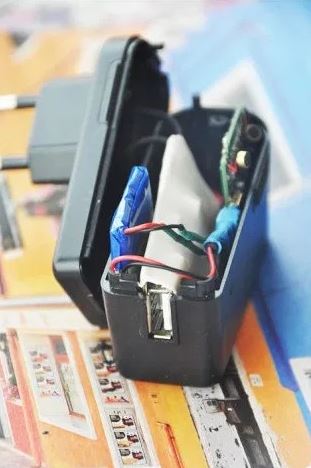
If the wiretap device works only with your own battery, you will need to think of a method to recharge it without the device being detected; even in spy movies this causes additional problems. One option is to insert a bug into an external battery to charge a smartphone. It is often carried with it, charged and, if not charged, becomes a power source for error.
Mounting the listening device
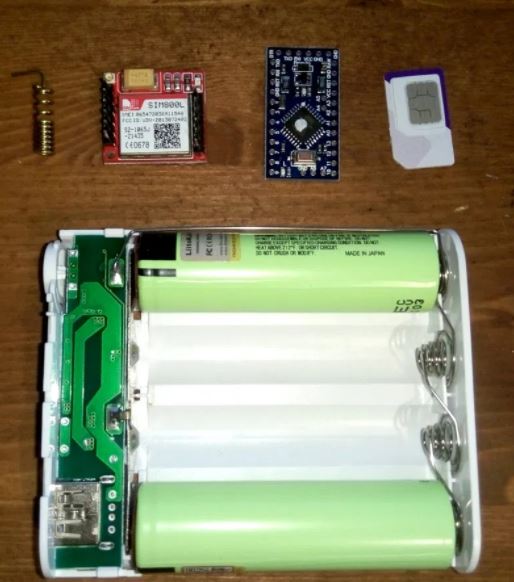
To mount the device we need:
- GSM Sim 800 module
- Arduino Pro mini
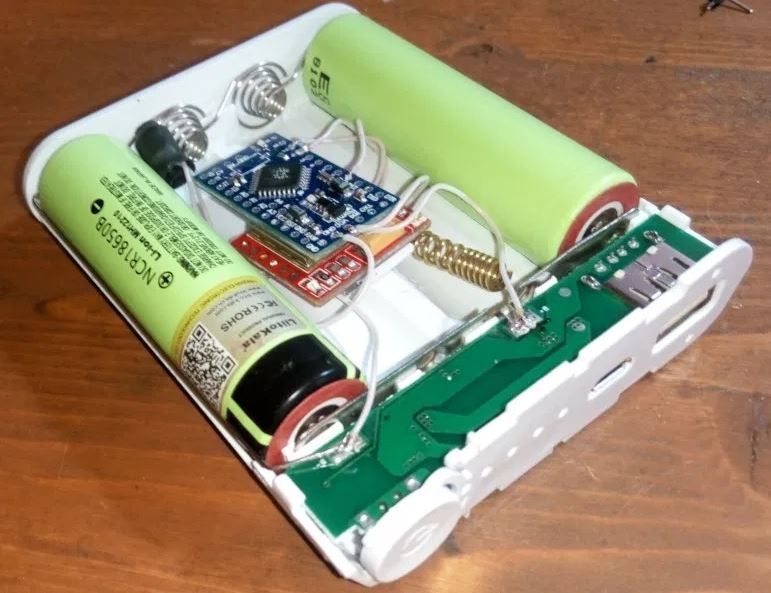
- One Power Bank set for four Li-ion 18650 batteries
- Two or three 18650 batteries (I used two)
- A microphone
- SIM card
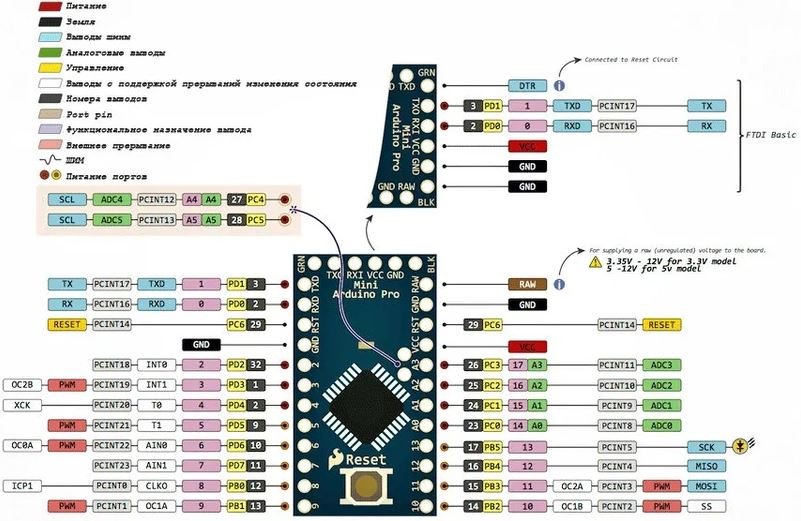
To properly assemble a wiretapping device, you need to know the pin assignments on the mini GSM Sim 800 and Arduino Pro modules.
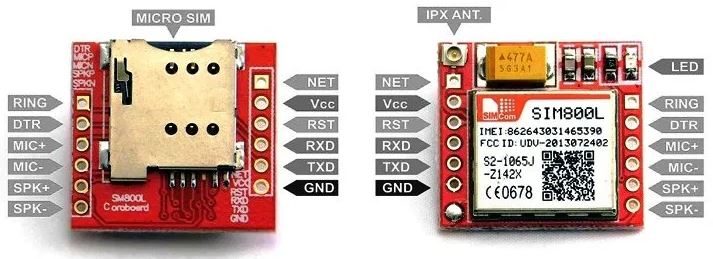
Next, we solder the antenna to the GSM module in the NET socket.
- For MIC + and microphone outputs for soldering MIC
- RXD and TXD on the GSM module to the sixth and seventh pins on the Arduino
- We solder Vccboth GNDfrom the module to the Arduino and to the contacts on the external battery
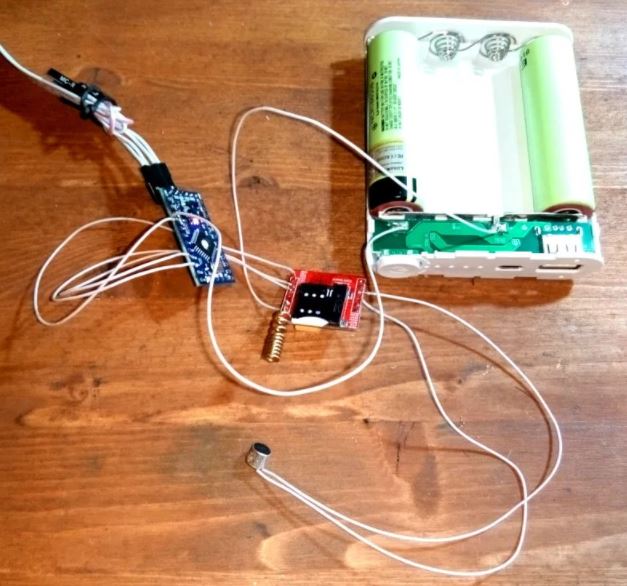
After soldering all the components in their places, you need to make sure that the soldering is correct: Next you will need to flash the controller.
// We connect the library for the software implementation of the UART protocol exchange
#include <SoftwareSerial.h>
SoftwareSerial SIM800 (7, 6); // RX, TX

// Set a variable to store the module response
String _response = "";
void setup () {
// The speed of data exchange with the computer
Serial.begin (19200);
// The speed of data exchange with the modem
SIM800.begin (19200);
Serial.println ("Start!");

// Send AT to set the baud rate
sendATCommand ("AT", true);

// Commands for configuring the modem at every start
// Turn on caller ID
_response = sendATCommand ("AT + CLIP = 1", true);
// Option with DTMF
// _ response = sendATCommand ("AT + DDET = 1", true);
}

String sendATCommand (String cmd, bool waiting) {
// Set a variable to store the result
String _resp = "";
// Duplicate the command to the port monitor
Serial.println (cmd);
// Send a command to the module
SIM800.println (cmd);
// If you need to wait for a response, wait for the response to be sent
if (waiting) {
_resp = waitResponse ();
// If Echo Mode is off (ATE0), then these three lines can be commented out
if (_resp.startsWith (cmd)) {
_resp = _resp.substring (_resp.indexOf ("\ r", cmd.length ()) + 2);
}
// Duplicate the response to the port monitor
Serial.println (_resp);
}
// Return the result. Empty if problem
return _resp;
}

// Function of waiting for a response and returning the result
String waitResponse () {
// Variable for storing the result
String _resp = "";
// Variable to track the timeout (10 seconds)
long _timeout = millis () + 10000;
// Wait 10 seconds for a response and check the response or timeout
while (! SIM800.available () && millis () <_timeout) {};
// If there is something to read, read and remember
if (SIM800.available ()) {
_resp = SIM800.readString ();
}
// If a timeout has come, we notify about it and return the result
else {
Serial.println ("Timeout ...");
}
return _resp;
}

void loop () {
// If the modem sent something, we get a response for analysis
if (SIM800.available ()) {
_response = waitResponse ();
// Remove extra spaces at the beginning and end and print the answer to the port monitor
_response.trim ();
Serial.println (_response);
// White list of phones, you can specify several of them separated by commas
String whiteListPhones = "+380713337866";
// If there is an incoming call, check if there is information about the number definition. If yes, then phoneindex> -1
if (_response.startsWith ("RING")) {
int phoneindex = _response.indexOf ("+ CLIP: \" ");
// Variable to store a specific number
String innerPhone = "";
// If information was found, parse the line and get the number
if (phoneindex> = 0) {
phoneindex + = 8;
innerPhone = _response.substring (phoneindex, _response.indexOf ("\" ", phoneindex));
// Print the number to the port monitor
Serial.println ("Number:" + innerPhone);
}
// Check that the length of the number is more than six digits and the number in the list
// If yes, then we answer the call, if not, then we reject the call
if (innerPhone.length ()> = 7 && whiteListPhones.indexOf (innerPhone)> = 0) {
sendATCommand ("ATA", true);
}
else {
sendATCommand ("ATH", true);
}
}
}
// Wait for Serial commands and send the received command to the modem
if (Serial.available ()) {
SIM800.write (Serial.read ());
};
}
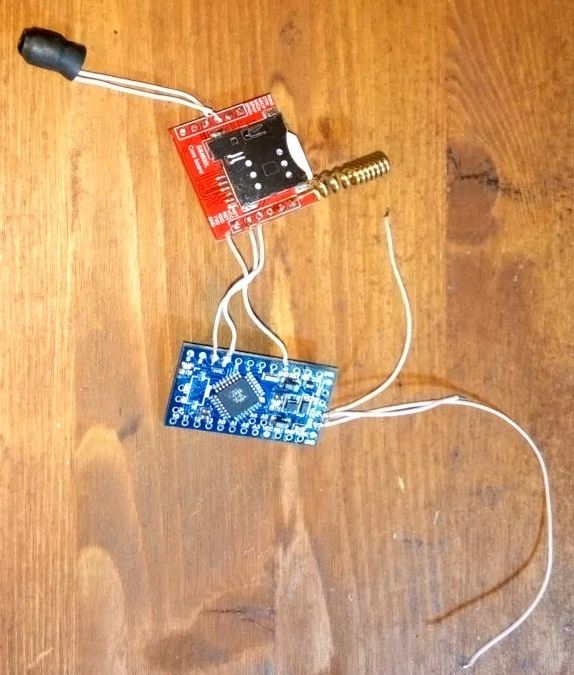
With proper sealing and firmware, our device will only answer incoming calls from authorized mobile numbers, which are registered in the firmware. Now it’s time to remove the long connection cables, unsolder the LEDs from the Arduino board. Next we will isolate the microphone with heat shrink, drill a hole in the external battery housing and attach it together with two boards to the hot glue, instead of one 18650 battery.
In the example shown in the article, two batteries were used, but you can use three if you want; there will be enough space.
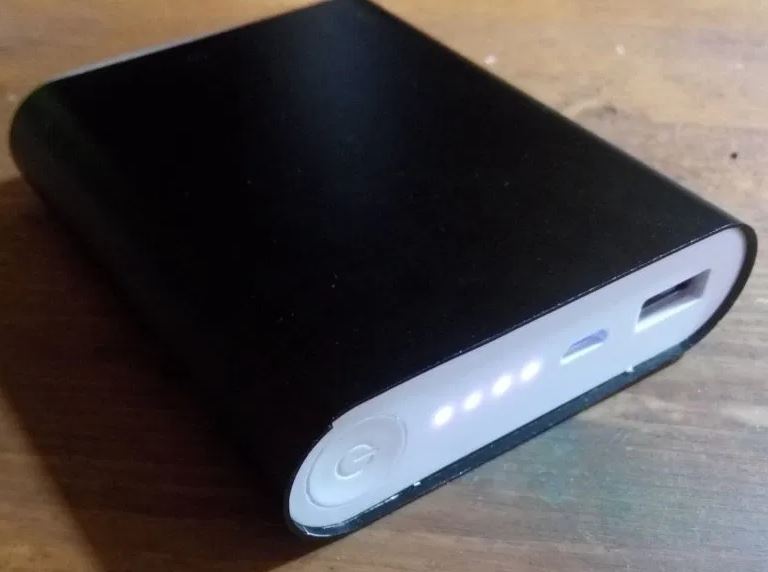
We have assembled a GSM bug in an external battery box. Of course, it is not perfect, but there are several ways to improve it.
- Take a case with a better battery capacity
- For greater autonomy, put the GSM module in sleep mode and, when you press the power button on the battery, activate its functions
- Send a message to the owner of the calls when you press a button on an external battery
Conclusions
We have designed and assembled a device fully capable of wiretapping a GSM bug. The cost of this homemade device is much lower than that of those developed by large intelligence companies or available on the Internet. If you decide to replicate this device, keep in mind that user privacy is inviolable, so you should not do this for malicious purposes.


Cyber Security Specialist with 18+ years of industry experience . Worked on the projects with AT&T, Citrix, Google, Conexant, IPolicy Networks (Tech Mahindra) and HFCL. Constantly keeping world update on the happening in Cyber Security Area.


