
There are many open source developers who want to show their skills by developing web applications. Every developer tries to show something new. Or some developers try to automate their tasks. According to ethical hacking researcher of international institute of cyber security there are many phases from developing web application to deploying it. But in developing any web application, infrastructure security which should always considered on top priority. Every developer verifies the external attacks on their application. But in development phase everything should be done securely. Web applications should be developed securely. We will show an script which is use to secure any linux server or local web servers or hardening linux server in which developers will be deploying their website.
LAMP
LAMP is an open source utility used for creating web applications. Lamp is also specified as Lamp stack because it consists of four layers.

Lamp stands for (Linux, Apache, MySQL and PHP). Many developers used LAMP to develop & deploy web application. JShielder is used to secure Linux servers in which developers want to deploy their web applications. Jshielder automates the process of installing required packages to host web applications. In other words JShielder act as a Server Hardening (Server Hardening is a process to enhance server security) Some common tips of server hardening includes :-
- Data Encryption for communication.
- Changes protocols which sends important information in plain text.
- Closes unnecessary services running on server.
- Keep OS up to date, specially the security patches & malware removal tools.
- Regularly update security policies.
- Maintains & regularly checks the server logs.
JShielder Requires following configuration:-
- Configures a Hostname
- Reconfigures the Timezone
- Updates the entire System
- Creates a New Admin user so you can manage your server safely without the need of doing remote connections with root.
- Helps user Generate Secure RSA Keys, so that remote access to your server is done exclusive from your local pc and no Conventional password
- Configures, Optimize and secures the SSH Server (Some Settings Following CIS Benchmark)
- Configures IPTABLES Rules to protect the server from common attacks
Disables unused FileSystems and Network protocols - Protects the server against Brute Force attacks by installing a configuring fail2ban
- Installs and Configure Artillery as a Honeypot, Monitoring, Blocking and Alerting tool
- Installs PortSentry
- Install, configure, and optimize MySQL
- Install the Apache Web Server
- Install, configure and secure PHP
- Secure Apache via configuration file and with installation of the Modules ModSecurity, ModEvasive, Qos and SpamHaus
- Secures NginX with the Installation of ModSecurity NginX module
Installs RootKit Hunter - Secures Root Home and Grub Configuration Files
- Installs Unhide to help Detect Malicious Hidden Processes
- Installs Tiger, A Security Auditing and Intrusion Prevention system
- Restrict Access to Apache Config Files
- Disables Compilers
- Creates Daily Cron job for System Updates
- Kernel Hardening via sysctl configuration File (Tweaked)
/tmp Directory Hardening - PSAD IDS installation
- Enables Process Accounting
- Enables Unattended Upgrades MOTD and Banners for Unauthorized access
- Disables USB Support for Improved Security (Optional)
- Configures a Restrictive Default UMASK
- Configures and enables Auditd
- Configures Auditd rules following CIS Benchmark
- Sysstat install
- ArpWatch install
- Additional Hardening steps following CIS Benchmark Secures Cron
- Automates the process of setting a GRUB Bootloader Password
Secures Boot Settings - Sets Secure File Permissions for Critical System Files
According to ethical hacking researcher of International Institute of Cyber Security, all the above points are required by network administrators to secure their servers.
JShielder Installation ;-
- For testing we will use Ubuntu 18.04 LTS. Before using JShielder LAMP must installed & configured in your Linux system. LAMP is just XAMPP which mostly used on Windows OS.
- For installing LAMP open terminal type sudo apt-get update && For installing mysql type sudo apt- get install mysql-server mysql-client
root@ubuntu:/home/iicybersecurity# sudo apt-get update
 Hit:1 https://security.ubuntu.com/ubuntu bionic-security InRelease
 Hit:2 https://us.archive.ubuntu.com/ubuntu bionic InRelease
 Hit:3 https://us.archive.ubuntu.com/ubuntu bionic-updates InRelease
 Hit:4 https://us.archive.ubuntu.com/ubuntu bionic-backports InRelease
 Reading package lists… Done
root@ubuntu:/home/iicybersecurity# sudo apt-get install mysql-server
 Reading package lists… Done
 Building dependency tree
 Reading state information… Done
 The following additional packages will be installed:
   libaio1 libevent-core-2.1-6 libhtml-template-perl mysql-client-5.7 mysql-client-core-5.7 mysql-server-5.7
   mysql-server-core-5.7
 Suggested packages:
   libipc-sharedcache-perl mailx tinyca
 The following NEW packages will be installed:
   libaio1 libevent-core-2.1-6 libhtml-template-perl mysql-client-5.7 mysql-client-core-5.7 mysql-server mysql-server-5.7
   mysql-server-core-5.7
- For installing apache type sudo apt-get install apache2 apache2-doc apache2-utils libexpat1 ssl-cert
root@ubuntu:/home/iicybersecurity# sudo apt-get install apache2 apache2-doc apache2-utils libexpat1 ssl-cert
 Reading package lists… Done
 Building dependency tree
 Reading state information… Done
 ssl-cert is already the newest version (1.0.39).
 libexpat1 is already the newest version (2.2.5-3ubuntu0.1).
 The following additional packages will be installed:
   apache2-bin apache2-data libapr1 libaprutil1 libaprutil1-dbd-sqlite3 libaprutil1-ldap liblua5.2-0
 Suggested packages:
   apache2-suexec-pristine | apache2-suexec-custom
 The following NEW packages will be installed:
   apache2 apache2-bin apache2-data apache2-doc apache2-utils libapr1 libaprutil1 libaprutil1-dbd-sqlite3
   libaprutil1-ldap liblua5.2-0
- For installing PHP type sudo apt-get install php && sudo apt-get install phpmyadmin This command will ask to reconfigure apache server. You have to select apache & then it will ask to configure password for myql. Enter secure password & all the dependencies will be configured. Password should be highly secure as it is always communicated in the day one class of International Institute of Cyber Security (IICS, iiCyberSecurity)
root@ubuntu:/home/iicybersecurity# sudo apt-get install php
 Reading package lists… Done
 Building dependency tree
 Reading state information… Done
 The following additional packages will be installed:
   libapache2-mod-php7.2 php-common php7.2 php7.2-cli php7.2-common php7.2-json php7.2-opcache php7.2-readline
 Suggested packages:
   php-pear
 The following NEW packages will be installed:
   libapache2-mod-php7.2 php php-common php7.2 php7.2-cli php7.2-common php7.2-json php7.2-opcache php7.2-readline
 0 upgraded, 9 newly installed, 0 to remove and 387 not upgraded.
 Need to get 3,863 kB of archives.
root@ubuntu:/home/iicybersecurity# sudo apt-get install phpmyadmin
 Reading package lists… Done
 Building dependency tree
 Reading state information… Done
 The following additional packages will be installed:
   dbconfig-common dbconfig-mysql libjs-sphinxdoc libzip4 php-bz2 php-curl php-gd php-mbstring php-mysql php-pear
   php-php-gettext php-phpseclib php-tcpdf php-xml php-zip php7.2-bz2 php7.2-curl php7.2-gd php7.2-mbstring php7.2-mysql
   php7.2-xml php7.2-zip
 Suggested packages:
   php-libsodium php-mcrypt php-gmp php-imagick
 The following NEW packages will be installed:
   dbconfig-common dbconfig-mysql libjs-sphinxdoc libzip4 php-bz2 php-curl php-gd php-mbstring php-mysql php-pear
   php-php-gettext php-phpseclib php-tcpdf php-xml php-zip php7.2-bz2 php7.2-curl php7.2-gd php7.2-mbstring php7.2-mysql
   php7.2-xml php7.2-zip phpmyadmin
- Now type git clone https://github.com/Jsitech/JShielder.git
root@ubuntu:/home/iicybersecurity/Downloads# git clone https://github.com/Jsitech/JShielder.git
 Cloning into 'JShielder'…
 remote: Enumerating objects: 70, done.
 remote: Counting objects: 100% (70/70), done.
 remote: Compressing objects: 100% (44/44), done.
 remote: Total 1192 (delta 48), reused 46 (delta 26), pack-reused 1122
 Receiving objects: 100% (1192/1192), 1.09 MiB | 764.00 KiB/s, done.
 Resolving deltas: 100% (624/624), done.
- Then type cd JShielder && ls JShielder is developed in bash script.
root@ubuntu:/home/iicybersecurity# cd Downloads/JShielder/
root@ubuntu:/home/iicybersecurity/Downloads/JShielder# ls
 'CentOS_7(Under Development)'   jshielder.sh   LICENSE   README.md   UbuntuServer_16.04LTS   UbuntuServer_18.04LTS
- Type ./jshielder.sh
root@myserver1:/home/iicybersecurity/Downloads/JShielder# ./jshielder.sh
     ██╗███████╗██╗  ██╗██╗███████╗██╗     ██████╗ ███████╗██████╗
     ██║██╔════╝██║  ██║██║██╔════╝██║     ██╔══██╗██╔════╝██╔══██╗
     ██║███████╗███████║██║█████╗  ██║     ██║  ██║█████╗  ██████╔╝
██   ██║╚════██║██╔══██║██║██╔══╝  ██║     ██║  ██║██╔══╝  ██╔══██╗
╚█████╔╝███████║██║  ██║██║███████╗███████╗██████╔╝███████╗██║  ██║
╚════╝ ╚══════╝╚═╝  ╚═╝╚═╝╚══════╝╚══════╝╚═════╝ ╚══════╝╚═╝  ╚═╝

Automated Hardening Script for Linux Servers
Developed By Jason Soto @JsiTech
---------------------------------------------------------------------------------------------------------
[+] SELECT YOUR LINUX DISTRIBUTION
---------------------------------------------------------------------------------------------------------

1. Ubuntu Server 16.04 LTS
2. Ubuntu Server 18.04 LTS
3. Linux CentOS 7 (Coming Soon)
4. Debian GNU/Linux 8 (Coming Soon)
5. Debian GNU/Linux 9 (Coming Soon)
6. Red Hat Linux 7 (Coming Soon)
7. Exit

2- Type 2
[+] SELECT THE DESIRED OPTION
1. LAMP Deployment
2. LEMP Deployment
3. Reverse Proxy Deployment With Apache
4. Running With SecureWPDeployer or JSDeployer Script
5. Customized Run (Only run desired Options)
6. CIS Benchmark Hardening
Exit

1
- Type 1
[+] Setting some Prerequisites
 [ +++++++++++++++++++++++++++++++++++++++++++++++++++++   ]'universe' distribution component is already enabled for all sources.
 Done.
  To EXIT Press x Key, Press ENTER to Continue
- Then it will display that universal distributed component is enabled. Press enter to configure further.
- Enter Y & type mysql1
- And then enter www.testsite1.com
¿Do you Wish to Set a HostName? (y/n): y
Type a Name to Identify this server :
  (For Example: myserver): mysql1
¿Type Domain Name?:www.testsite1.com

Creating legal Banners for unauthorized access
 [ +++++++++++++++++++++++++++++++++++++++++++++++++++++   ]OK
 Done.
  To EXIT Press x Key, Press ENTER to Continue
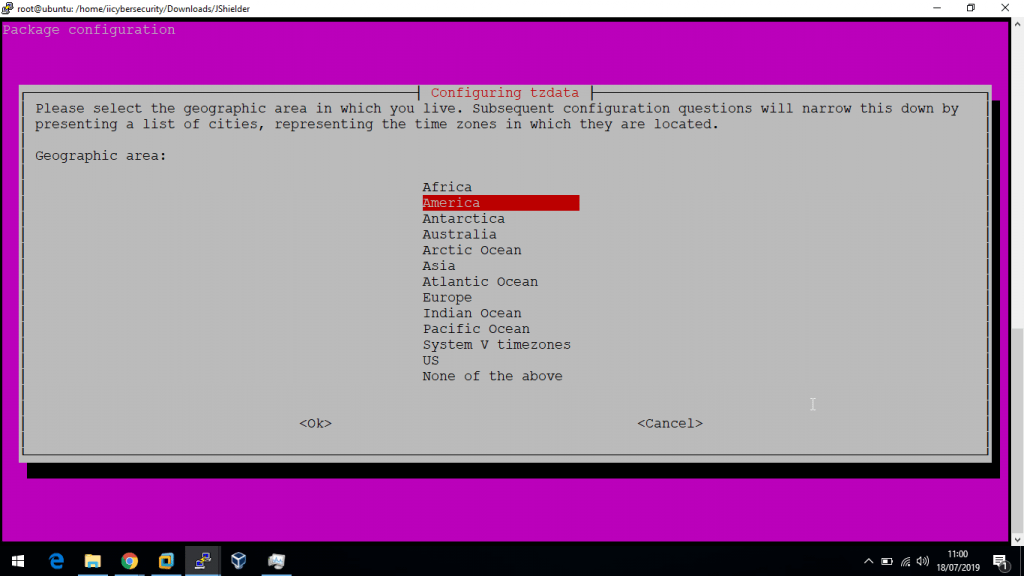
- Then configure timezone.
[+] We will now Configure the TimeZone
 Current default time zone: 'America/Los_Angeles'
- Then select country.
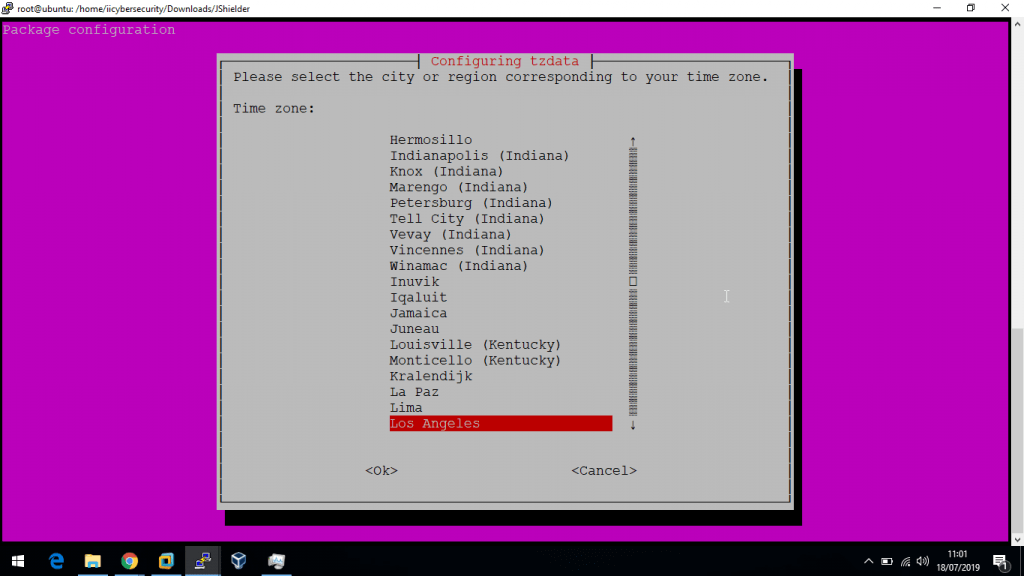
[+] We will now Configure the TimeZone
 Current default time zone: 'America/Los_Angeles'
 Local time is now:      Wed Jul 17 22:31:34 PDT 2019.
 Universal Time is now:  Thu Jul 18 05:31:34 UTC 2019.
 Done.

  To EXIT Press x Key, Press ENTER to Continue
- Then server will run an update. This command will search for available updates for the system. & will install required updates.
- It might take time depending on your internet speed.
[+] Updating the System
 Hit:1 https://security.ubuntu.com/ubuntu bionic-security InRelease
 Hit:2 https://us.archive.ubuntu.com/ubuntu bionic InRelease
 Hit:3 https://us.archive.ubuntu.com/ubuntu bionic-updates InRelease
 Hit:4 https://us.archive.ubuntu.com/ubuntu bionic-backports InRelease
 Reading package lists… Done
 Building dependency tree
 Reading state information… Done
 387 packages can be upgraded. Run 'apt list --upgradable' to see them.
 Reading package lists… Done
 Building dependency tree
 Reading state information… Done
 Calculating upgrade… Done
 The following package was automatically installed and is no longer required:
   libllvm7
 Use 'sudo apt autoremove' to remove it.
 The following NEW packages will be installed:
   gstreamer1.0-gtk3 libllvm8 linux-headers-4.18.0-25 linux-headers-4.18.0-25-generic linux-image-4.18.0-25-generic
   linux-modules-4.18.0-25-generic linux-modules-extra-4.18.0-25-generic python3-dateutil
 The following packages will be upgraded:

apport apport-gtk apt apt-utils aptdaemon aptdaemon-data bash bind9-host binutils binutils-common
   binutils-x86-64-linux-gnu busybox-initramfs busybox-static bzip2 console-setup console-setup-linux cpp cups

Done.
  To EXIT Press x Key, Press ENTER to Continue
- After installing updates press enter.
 [+] Setting UMASK to a more Restrictive Value (027)
 [ ++++++++++++++++++++++++++++++++++++++++++++++++++++++  ]
 OK
 Done.
  To EXIT Press x Key, Press ENTER to Continue
- Now JShielder will enhance security by blocking or disabling unnecessary components of system.
 [+] Disabling Unused FileSystems
 [ ++++++++++++++++++++++++++++++++++++++++++++++++++++++  ] OK
 Done.
  To EXIT Press x Key, Press ENTER to Continue
- Now JShielder will block uncommon network ports to restrict scanning from external sources used in ethical hacking phases of pentesting.
[+] Disabling Uncommon Network Protocols
 [ ++++++++++++++++++++++++++++++++++++++++++++++++++++++  ] OK
 Done.
  To EXIT Press x Key, Press ENTER to Continue
- Create new user. Enter username & password
- Enter username testuser1 & password 123456
- Enter y
[+] We will now Create a New User Type the new username: testuser1 Adding usertestuser1' ... Adding new grouptestuser1' (1001) … Adding new usertestuser1' (1001) with grouptestuser1' … Creating home directory/home/testuser1' ... Copying files from/etc/skel' … Enter new UNIX password: Retype new UNIX password: passwd: password updated successfully Changing the user information for testuser1 Enter the new value, or press ENTER for the default Full Name []:Room Number []:Work Phone []:Home Phone []:Other []:Is the information correct? [Y/n] y Done. To EXIT Press x Key, Press ENTER to Continue
[+] Instructions to Generate an RSA KEY PAIR
 *** IF YOU DONT HAVE A PUBLIC RSA KEY, GENERATE ONE ***
      Follow the Instruction and Hit Enter When Done
      To receive a new Instruction
 RUN THE FOLLOWING COMMANDS  a) ssh-keygen -t rsa -b 4096
- Copy & paste above command in the same terminal & hit enter.
ssh-keygen -t rsa -b 4096b) cat /home/testuser1/.ssh/id_rsa.pub >> /home/testuser1/.ssh/authorized_keysDone. To EXIT Press x Key, Press ENTER to Continue Run the Following Command to copy the Key Press ENTER when done ssh-copy-id -i /root/.ssh/id_rsa.pub testuser1@192.168.1.11 Done. To EXIT Press x Key, Press ENTER to Continue [+] Securing SSH [ ++++++++++++++++++++++++++++++++++++++++++++++++++++++ ]OK chattr: No such file or directory while trying to stat /home/testuser1/.ssh/authorized_keys Done. To EXIT Press x Key, Press ENTER to Continue
- From SSH will be secured. Then it will install Fail2ban which works as intrusion prevention system. It main motive to protect from brute force attacks.
[+] Setting IPTABLE RULES
 [ +++++++++++++++++++++++++++++++++++++++++++++++++++++++ ]
 Done.
  To EXIT Press x Key, Press ENTER to Continue

[+] Installing Fail2Ban
 Reading package lists… Done
 Building dependency tree
 Reading state information… Done
 The following package was automatically installed and is no longer required:
   libllvm7
 Use 'sudo apt autoremove' to remove it.
 The following additional packages will be installed:
   liblockfile-bin liblockfile1 lockfile-progs procmail sendmail-base sendmail-bin sendmail-cf sensible-mda
 Suggested packages:
   sendmail-doc rmail logcheck resolvconf sasl2-bin
 The following NEW packages will be installed:
   liblockfile-bin liblockfile1 lockfile-progs procmail sendmail sendmail-base sendmail-bin sendmail-cf sensible-mda
 0 upgraded, 9 newly installed, 0 to remove and 1 not upgraded.
 374 not fully installed or removed.
 Need to get 899 kB of archives.
 After this operation, 4,449 kB of additional disk space will be used.
 Do you want to continue? [Y/n] Y
- Then it will remove python-pyinotifiy enter Y to remove python dependency.
Use 'sudo apt autoremove' to remove it.
 The following additional packages will be installed:
   python3-pyinotify whois
 Suggested packages:
   mailx monit sqlite3 python-pyinotify-doc
 The following NEW packages will be installed:
   fail2ban python3-pyinotify whois
 0 upgraded, 3 newly installed, 0 to remove and 1 not upgraded.
 Need to get 398 kB of archives.
 After this operation, 2,110 kB of additional disk space will be used.
 Do you want to continue? [Y/n] Y
 Get:1 https://us.archive.ubuntu.com/ubuntu bionic/universe amd64 fail2ban all 0.10.2-2 [329 kB]

Created symlink /etc/systemd/system/multi-user.target.wants/fail2ban.service → /lib/systemd/system/fail2ban.service.
 Processing triggers for ureadahead (0.100.0-21) …
 Setting up whois (5.3.0) …
 Processing triggers for systemd (237-3ubuntu10.24) …
 Processing triggers for man-db (2.8.3-2ubuntu0.1) …
 Setting up python3-pyinotify (0.9.6-1) …
 Done.
  To EXIT Press x Key, Press ENTER to Continue
- Then it will install mysql
[+] Installing, Configuring and Optimizing MySQL
 Reading package lists… Done
 Building dependency tree
 Reading state information… Done
 mysql-server is already the newest version (5.7.26-0ubuntu0.18.04.1).
 The following package was automatically installed and is no longer required:
   libllvm7
 Use 'sudo apt autoremove' to remove it.
 0 upgraded, 0 newly installed, 0 to remove and 1 not upgraded.
 [ +++++++++++++++++++++++++++++++++++++++++++++++++++++++ ] OK
 Securing the MySQL server deployment.

 Connecting to MySQL using a blank password.\

 VALIDATE PASSWORD PLUGIN can be used to test passwords
 and improve security. It checks the strength of password
 and allows the users to set only those passwords which are
 secure enough. Would you like to setup VALIDATE PASSWORD plugin?

 Press y|Y for Yes, any other key for No:y
- Choose the password policy. Enter 1
There are three levels of password validation policy:
 LOW    Length >= 8
 MEDIUM Length >= 8, numeric, mixed case, and special characters
 STRONG Length >= 8, numeric, mixed case, special characters and dictionary                  file
 Please enter 0 = LOW, 1 = MEDIUM and 2 = STRONG: 1

New password:

Re-enter new password:

Estimated strength of the password: 100
 Do you wish to continue with the password provided?(Press y|Y for Yes, any other key for No) :y
- Enter y & remove the anonymous user for enhancing security of the mysql. This will restrict anonymous login into mysql. As per Digital forensics expert of iicybersecurity, some DB Admin leave anonymous login, which further helps in attacks.
 By default, a MySQL installation has an anonymous user,
 allowing anyone to log into MySQL without having to have
 a user account created for them. This is intended only for
 testing, and to make the installation go a bit smoother.
 You should remove them before moving into a production
 environment.
 Remove anonymous users? (Press y|Y for Yes, any other key for No) :y
- This depends totally on requirement whether to give remote root access or not. So we will enter n
 Normally, root should only be allowed to connect from
 'localhost'. This ensures that someone cannot guess at
 the root password from the network.
 Disallow root login remotely? (Press y|Y for Yes, any other key for No): n
- Remove the test user which comes by default in mysql. Enter y
By default, MySQL comes with a database named 'test' that
 anyone can access. This is also intended only for testing,
 and should be removed before moving into a production
 environment.
 Remove test database and access to it? (Press y|Y for Yes, any other key for No) : y

 Dropping test database…
 Success.

 Removing privileges on test database…
 Success.

 Reloading the privilege tables will ensure that all changes
 made so far will take effect immediately.
 Reload privilege tables now? (Press y|Y for Yes, any other key for No) :y

Success.
 All done!
 Done.
  To EXIT Press x Key, Press ENTER to Continue
- Then it will apache web server.
[+] Installing Apache Web Server
 Reading package lists… Done
 Building dependency tree
 Reading state information… Done
 apache2 is already the newest version (2.4.29-1ubuntu4.7).
 The following package was automatically installed and is no longer required:
   libllvm7
 Use 'sudo apt autoremove' to remove it.
 0 upgraded, 0 newly installed, 0 to remove and 1 not upgraded.
 Done.
  To EXIT Press x Key, Press ENTER to Continue
- Then it will install PHP required files.
[+] Installing, Configuring and Optimizing PHP
 Reading package lists… Done
 Building dependency tree
 Reading state information… Done
 php is already the newest version (1:7.2+60ubuntu1).
 php-pear is already the newest version (1:1.10.5+submodules+notgz-1ubuntu1.18.04.1).
 php-pear set to manually installed.
 The following package was automatically installed and is no longer required:
   libllvm7
 Use 'sudo apt autoremove' to remove it.
 The following NEW packages will be installed:
   php-cli
 0 upgraded, 1 newly installed, 0 to remove and 1 not upgraded.
 Need to get 3,160 B of archives.
 After this operation, 12.3 kB of additional disk space will be used.
 Get:1 https://us.archive.ubuntu.com/ubuntu bionic/main amd64 php-cli all 1:7.2+60ubuntu1 [3,160 B]
 Fetched 3,160 B in 1s (2,978 B/s)

Preparing to unpack …/python-mysqldb_1.3.10-1build1_amd64.deb …
 Unpacking python-mysqldb (1.3.10-1build1) …
 Setting up python-mysqldb (1.3.10-1build1) …
 [ +++++++++++++++++++++++++++++++++++++++++++++++++++++++ ] OK
  OK
 Done.
  To EXIT Press x Key, Press ENTER to Continue
- Then it will install modsecurity.
[+] Installing ModSecurity
 Reading package lists… Done
 Building dependency tree
 Reading state information… Done
 libxml2 is already the newest version (2.9.4+dfsg1-6.1ubuntu1.2).
 The following package was automatically installed and is no longer required:
   libllvm7
 Use 'sudo apt autoremove' to remove it.
 The following NEW packages will be installed:
   libxml2-dev libxml2-utils
 0 upgraded, 2 newly installed, 0 to remove and 1 not upgraded.
 Need to get 793 kB of archives.
 After this operation, 3,731 kB of additional disk space will be used.
 Do you want to continue? [Y/n] Y

Preparing to unpack …/modsecurity-crs_3.0.2-1_all.deb …
 Unpacking modsecurity-crs (3.0.2-1) …
 Setting up modsecurity-crs (3.0.2-1) …
 Processing triggers for libc-bin (2.27-3ubuntu1) …
 Setting up liblua5.1-0:amd64 (5.1.5-8.1build2) …
 Setting up libapache2-mod-security2 (2.9.2-1) …
 apache2_invoke: Enable module security2
 Processing triggers for libc-bin (2.27-3ubuntu1) …
 Done.
  To EXIT Press x Key, Press ENTER to Continue
- After then run the following command to restart apache2.
[+] Setting UP OWASP Rules for ModSecurity
 [ +++++++++++++++++++++++++++++++++++++++++++++++++++++++ ]OK
 Enabling module headers.
 To activate the new configuration, you need to run:
   systemctl restart apache2
 Done.
  To EXIT Press x Key, Press ENTER to Continue


 [+] Optimizing Apache
 -- Enabling ModRewrite
 [ ++++++++++++++++++++++++++++++++++++++++++++++++++++++  ]Enabling module rewrite.
 To activate the new configuration, you need to run:
   systemctl restart apache2
 Done.
  To EXIT Press x Key, Press ENTER to Continue
- Enter email id to receive alerts.
[+] Installing ModEvasive
 Type Email to Receive Alerts testemail.com
 Reading package lists… Done
 Building dependency tree
 Reading state information… Done
 The following package was automatically installed and is no longer required:
   libllvm7
 Use 'sudo apt autoremove' to remove it.
 The following additional packages will be installed:
   bsd-mailx
 The following NEW packages will be installed:
   bsd-mailx libapache2-mod-evasive
 0 upgraded, 2 newly installed, 0 to remove and 1 not upgraded.
 Need to get 80.5 kB of archives.
 After this operation, 256 kB of additional disk space will be used.
 Do you want to continue? [Y/n] Y
 Get:1 https://us.archive.ubuntu.com/ubuntu bionic/main amd64 bsd-mailx amd64 8.1.2-0.20160123cvs-4 [66.0 kB]
 Get:2 https://us.archive.ubuntu.com/ubuntu bionic/universe amd64 libapache2-mod-evasive amd64 1.10.1-3 [1

Processing triggers for man-db (2.8.3-2ubuntu0.1) …
 Setting up libapache2-mod-evasive (1.10.1-3) …
 apache2_invoke: Enable module evasive
 Done.
  To EXIT Press x Key, Press ENTER to Continue
- Install Mod_Qos
[+] Installing Mod_Qos/Spamhaus
 Reading package lists… Done
 Building dependency tree
 Reading state information… Done
 The following package was automatically installed and is no longer required:
   libllvm7
 Use 'sudo apt autoremove' to remove it.
 The following NEW packages will be installed:
   libapache2-mod-qos
 0 upgraded, 1 newly installed, 0 to remove and 1 not upgraded.
 Need to get 202 kB of archives.
 After this operation, 744 kB of additional disk space will be used.
 Get:1 https://us.archive.ubuntu.com/ubuntu bionic/universe amd64 libapache2-mod-qos amd64 11.44-1build1 [202 kB]
 Fetched 202 kB in 3s (80.2 kB/s)
 Selecting previously unselected package libapache2-mod-qos

Building dependency tree
 Reading state information… Done
 E: Unable to locate package libapache2-mod-spamhaus
 Done.
  To EXIT Press x Key, Press ENTER to Continue
- Then it will configure Fail2ban
[+] Configuring Fail2Ban
 Configuring Fail2Ban……
 [ ok ++++++++++++++++++++++++++++++++++++++++++++++++++   ][….] Restarting fail2ban (via systemctl): fail2ban.service.
 Done.
  To EXIT Press x Key, Press ENTER to Continue
- Install additional packages.
[+] Installing Additional Packages
 Install tree………….
 Reading package lists… Done
 Building dependency tree
 Reading state information… Done
 The following package was automatically installed and is no longer required:
   libllvm7
 Use 'sudo apt autoremove' to remove it.
 The following NEW packages will be installed:
   tree
 0 upgraded, 1 newly installed, 0 to remove and 1 not upgraded.
 Need to get 40.7 kB of archives.
 After this operation, 105 kB of additional disk space will be used.
 Get:1 https://us.archive.ubuntu.com/ubuntu bionic/universe amd64 tree amd64 1.7.0-5 [40.7 kB]
 Fetched 40.7 kB in 2s (24.3 kB/s)
 Selecting previously unselected package tree.
 (Reading database … 228842 files and directories currently installed.)
 Preparing to unpack …/tree_1.7.0-5_amd64.deb …
 Unpacking tree (1.7.0-5) …
 Setting up tree (1.7.0-5) …
 Processing triggers for man-db (2.8.3-2ubuntu0.1) …

Setting up apt-show-versions (0.22.7ubuntu1) …
 ** initializing cache. This may take a while **
 Processing triggers for man-db (2.8.3-2ubuntu0.1) …
 Install PHPUnit……….
 config-set succeeded
 Done.
  To EXIT Press x Key, Press ENTER to Continue
- Then it will install ipv6 dependencies & will install server additional hardening & press y or n for enabling or disabling USB support.
[+] Running additional Hardening Steps
 Running Additional Hardening Steps….
 Reading package lists… Done++++++++++++++++++++++++++   ]
 Building dependency tree
 Reading state information… Done
 Package 'at' is not installed, so not removed
 The following package was automatically installed and is no longer required:
   libllvm7
 Use 'sudo apt autoremove' to remove it.
 0 upgraded, 0 newly installed, 0 to remove and 1 not upgraded.
 Reading package lists… Done
 Building dependency tree
 Reading state information… Done
 The following package was automatically installed and is no longer required:
   libllvm7

Preparing to unpack …/libpam-cracklib_1.1.8-3.6ubuntu2.18.04.1_amd64.deb …
 Unpacking libpam-cracklib:amd64 (1.1.8-3.6ubuntu2.18.04.1) …
 Processing triggers for man-db (2.8.3-2ubuntu0.1) …
 Setting up libpam-cracklib:amd64 (1.1.8-3.6ubuntu2.18.04.1) …
 Securing Cron
 [ +++++++++++++++++++++++++++++++++++++++++++++++++++++   ]
Do you want to Disable USB Support for this Server? (y/n): n
OK
 Done.
  To EXIT Press x Key, Press ENTER to Continue
- Install Unhide for displaying hidden processes which are running in the background.
[+] Installing UnHide
 Unhide is a forensic tool to find hidden processes and TCP/UDP ports by rootkits / LKMs or by another hidden technique.
 Reading package lists… Done
 Building dependency tree
 Reading state information… Done
 The following package was automatically installed and is no longer required:
   libllvm7
 Use 'sudo apt autoremove' to remove it.
 Suggested packages:
   rkhunter
 The following NEW packages will be installed:
   unhide
 0 upgraded, 1 newly installed, 0 to remove and 1 not upgraded.
 Need to get 46.6 kB of archives.
 After this operation, 136 kB of additional disk space will be used.
 Get:1 https://us.archive.ubuntu.com/ubuntu bionic/universe amd64 unhide amd64 20130526-1 [46.6 kB]
 Fetched 46.6 kB in 2s (25.9 kB/s)
 Selecting previously unselected package unhide.
 (Reading database … 228917 files and directories currently installed.)
 Preparing to unpack …/unhide_20130526-1_amd64.deb …
 Unpacking unhide (20130526-1) …
 Setting up unhide (20130526-1) …
 Processing triggers for man-db (2.8.3-2ubuntu0.1) …

Done.
  To EXIT Press x Key, Press ENTER to Continue
- Install Tiger dependency.
[+] Installing Tiger
 Tiger is a security tool that can be use both as a security audit and intrusion detection system
 Reading package lists… Done
 Building dependency tree
 Reading state information… Done
 The following package was automatically installed and is no longer required:
   libllvm7
 Use 'sudo apt autoremove' to remove it.
 The following additional packages will be installed:
   chkrootkit john john-data tripwire
 The following NEW packages will be installed:
   chkrootkit john john-data tiger tripwire
 0 upgraded, 5 newly installed, 0 to remove and 1 not upgraded.
 Need to get 6,868 kB of archives.
 After this operation, 24.0 MB of additional disk space will be used.
 Get:1 https://us.archive.ubuntu.com/ubuntu bionic/universe amd64 tripwire amd64 2.4.3.1-2 [1,647 kB]

Setting up john-data (1.8.0-2build1) …
 Setting up john (1.8.0-2build1) …
 For More info about the Tool use the ManPages
  man tiger
 Done.
  To EXIT Press x Key, Press ENTER to Continue
- Install rootkit hunter.
[+] Installing RootKit Hunter Rootkit Hunter is a scanning tool to ensure you are you're clean of nasty tools. This tool scans for rootkits, backdoors and local exploits by running tests like:- MD5 hash compare- Look for default files used by rootkits- Wrong file permissions for binaries- Look for suspected strings in LKM and KLD modules- Look for hidden files- Optional scan within plaintext and binary filesFile updated: searched for 181 files, found 152 ***To Run RootKit Hunter *** rkhunter -c --enable all --disable none Detailed report on /var/log/rkhunter.log Done. To EXIT Press x Key, Press ENTER to Continue
- Then it will tune bashrc.
[+] Tunning bashrc, nano and Vim
 Tunning .bashrc……
 [ ++++++++++++++++++++++++++++++++++++++++++++++++++++++  ]OK
 Tunning Vim……
 [ +++++++++++++++++++++++++++++++++++++++++++++++++++++   ]OK
 Tunning Nano……
 [ ++++++++++++++++++++++++++++++++++++++++++++++++++++++  ]OK
 Done.
  To EXIT Press x Key, Press ENTER to Continue
- Then JShielder will update create cron job.
[+] Adding Daily System Update Cron Job
 Creating Daily Cron Job
 [ +++++++++++++++++++++++++++++++++++++++++++++++++++++   ]
 Done.
  To EXIT Press x Key, Press ENTER to Continue
- Most of configuration of JShielder will be automate. So now it will install artillery.
[+] Cloning Repo and Installing Artillery
 fatal: destination path 'artillery' already exists and is not an empty directory.
 Welcome to the Artillery installer. Artillery is a honeypot, file monitoring, and overall security tool used to protect your nix systems.
 Written by: Dave Kennedy (ReL1K)

 Do you want to install Artillery and have it automatically run when you restart [y/n]: y

[] Adding artillery into startup through init scripts.. [] Triggering update-rc.d on artillery to automatic start…
 [*] Checking out Artillery through github to /var/artillery
 Cloning into '/var/artillery'…
 remote: Enumerating objects: 35, done.
 remote: Counting objects: 100% (35/35), done.
 remote: Compressing objects: 100% (35/35), done.
 remote: Total 1632 (delta 17), reused 3 (delta 0), pack-reused 1597

Setting Iptable rules for artillery
 [ +++++++++++++++++++++++++++++++++++++++++++++++++++++++ ]
 Artillery configuration file is /var/artillery/config
 Done.
  To EXIT Press x Key, Press ENTER to Continue
- Install PSAD
[+] Install PSAD
 PSAD is a piece of Software that actively monitors you Firewall Logs to Determine if a scan
        or attack event is in Progress. It can alert and Take action to deter the Threat
    NOTE:    IF YOU ARE ONLY RUNNING THIS FUNCTION, YOU MUST ENABLE

 LOGGING FOR iptables
 iptables -A INPUT -j LOG   \
 iptables -A FORWARD -j LOG

 Do you want to install PSAD (Recommended)? (y/n): y

To EXIT Press x Key, Press ENTER to Continue
- Then disable compilers.
[+] Disabling Compilers
 Disabling Compilers…..
 [ ++++++++++++++++++++++++++++++++++++++++++++++++++++++  ]
  If you wish to use them, just change the Permissions
  Example: chmod 755 /usr/bin/gcc
  OK
 Done.
  To EXIT Press x Key, Press ENTER to Continue
- Now secure the tmp folder. Enter y
[+] Securing /tmp Folder
 ¿Did you Create a Separate /tmp partition during the Initial Installation? (y/n): y

Nice Going, Remember to set proper permissions in /etc/fstab
 Example:
 /dev/sda4   /tmp   tmpfs  loop,nosuid,noexec,rw  0 0
 Done.
  To EXIT Press x Key, Press ENTER to Continue
- JShielder will restrict access to apache config files.
[+] Restricting Access to Apache Config Files
 Restricting Access to Apache Config Files……
 [ ++++++++++++++++++++++++++++++++++++++++++++++++++++    ] OK
 Done.
  To EXIT Press x Key, Press ENTER to Continue
- Then it will restrict unattended security updates. Press y
[+] Enable Unattended Security Updates
 ¿Do you Wish to Enable Unattended Security Updates? (y/n): y
- It will install accounting dependency.
0 upgraded, 1 newly installed, 0 to remove and 1 not upgraded.
 Need to get 87.2 kB of archives.
 After this operation, 304 kB of additional disk space will be used.
 Get:1 https://us.archive.ubuntu.com/ubuntu bionic/main amd64 acct amd64 6.6.4-1 [87.2 kB]
 Fetched 87.2 kB in 2s (48.7 kB/s)
 Selecting previously unselected package acct.
 (Reading database … 229408 files and directories currently installed.)
 Preparing to unpack …/acct_6.6.4-1_amd64.deb …
 Unpacking acct (6.6.4-1) …
 Processing triggers for ureadahead (0.100.0-21) …
 Processing triggers for install-info (6.5.0.dfsg.1-2) …
 Setting up acct (6.6.4-1) …
 update-rc.d: warning: start and stop actions are no longer supported; falling back to defaults
 update-rc.d: warning: stop runlevel arguments (1) do not match acct Default-Stop values (0 1 6)
 Processing triggers for libc-bin (2.27-3ubuntu1) …
 Processing triggers for systemd (237-3ubuntu10.24) …
 Processing triggers for man-db (2.8.3-2ubuntu0.1) …
 Processing triggers for ureadahead (0.100.0-21) …
 OK
- Install autitd enter y
[+] Installing auditd
 Reading package lists… Done
 Building dependency tree
 Reading state information… Done
 The following package was automatically installed and is no longer required:
   libllvm7
 Use 'sudo apt autoremove' to remove it.
 The following additional packages will be installed:
   libauparse0
 Suggested packages:
   audispd-plugins

After this operation, 803 kB of additional disk space will be used.
 Do you want to continue? [Y/n] Y

Processing triggers for systemd (237-3ubuntu10.24) …
 Processing triggers for man-db (2.8.3-2ubuntu0.1) …
 Processing triggers for ureadahead (0.100.0-21) …
 Enabling auditing for processes that start prior to auditd
 [ +++++++++++++++++++++++++++++++++++++++++++++++++++++++ ]Sourcing file `/etc/default/grub'
 Generating grub configuration file …
 Found linux image: /boot/vmlinuz-4.18.0-25-generic
 Found initrd image: /boot/initrd.img-4.18.0-25-generic
 Found linux image: /boot/vmlinuz-4.18.0-15-generic
 Found initrd image: /boot/initrd.img-4.18.0-15-generic
 Found memtest86+ image: /boot/memtest86+.elf
 Found memtest86+ image: /boot/memtest86+.bin
 done
 Configuring Auditd Rules
 [ ++++++++++++++++++++++++++++++++++++++++++++++++++++++  ]

Done.
  To EXIT Press x Key, Press ENTER to Continue
- JShielder will install & enable sys stat.
[+] Installing and enabling sysstat
 Reading package lists… Done
 Building dependency tree
 Reading state information… Done
 The following package was automatically installed and is no longer required:
   libllvm7
 Use 'sudo apt autoremove' to remove it.
 Suggested packages:
   isag
 The following NEW packages will be installed:
   sysstat
 0 upgraded, 1 newly installed, 0 to remove and 1 not upgraded.
 Need to get 295 kB of archives.
 After this operation, 1,192 kB of additional disk space will be used.
 Get:1 https://us.archive.ubuntu.com/ubuntu bionic/main amd64 sysstat amd64 11.6.1-1 [295 kB]
 Fetched 295 kB in 2s (124 kB/s)

Processing triggers for systemd (237-3ubuntu10.24) …
 Processing triggers for man-db (2.8.3-2ubuntu0.1) …

 OK
 Done.
  To EXIT Press x Key, Press ENTER to Continue
- Install arpwatch for monitoring ARP traffic. Enter y
[+] ArpWatch Install
 ArpWatch is a tool for monitoring ARP traffic on System. It generates log of observed pairing of IP and MAC.
 Do you want to Install ArpWatch on this Server? (y/n): y

Synchronizing state of arpwatch.service with SysV service script with /lib/systemd/systemd-sysv-install.
 Executing: /lib/systemd/systemd-sysv-install enable arpwatch

 OK
 Done.
  To EXIT Press x Key, Press ENTER to Continue
- Set GNU Bootloader password. More information on working of bootloader is part of advance ethical hacking course of International Institute of Cyber Security (IICS, iiCyberSecurity).
[+] GRUB Bootloader Password
 It is recommended to set a password on GRUB bootloader to prevent altering boot configuration (e.g. boot in single user mode without password)
 Do you want to set a GRUB Bootloader Password? (y/n): y

Do you want to set a GRUB Bootloader Password? (y/n): y
 Enter password:
 Reenter password:
 PBKDF2 hash of your password is grub.pbkdf2.sha512.10000.15D5D8416652D02126C81FCF8C49A59B82F070F8010A13412C420345E97AA9CADC8798E7218A27105875C0C0950DC6A7EAC1D3DA92C32A6107FF572CB42A1D53.C05B506339CB3227411FF804E9587808E40CD72DD07CD749B004D324E9F90D2A4D092E6C9BE64E6E61DC71FB32A8DB00E65CA7BE6582975E30F64C9D46CD1C19
 Sourcing file `/etc/default/grub'
 Generating grub configuration file …

Found memtest86+ image: /boot/memtest86+.bin
 done
 On every boot enter root user and the password you just set
 OK
 Done.
  To EXIT Press x Key, Press ENTER to Continue
- Secure boot settings.
Securing Boot Settings
 [ +++++++++++++++++++++++++++++++++++++++++++++++++++++++ ]
 Done.
  To EXIT Press x Key, Press ENTER to Continue


 [+] Setting File Permissions on Critical System Files
 [ +++++++++++++++++++++++++++++++++++++++++++++++++++++   ]
 Setting Sticky bit on all world-writable directories
 [ +++++++++++++++++++++++++++++++++++++++++++++++++++++   ]
: Read-only file system
 chmod: changing permissions of '/snap/core/7270/tmp': Read-only file system
 chmod: changing permissions of '/snap/core/7270/var/tmp': Read-only file system
 chmod: changing permissions of '/snap/core/6350/run/lock': Read-only file system
 chmod: changing permissions of '/snap/core/6350/tmp': Read-only file system
 chmod: changing permissions of '/snap/core/6350/var/tmp': Read-only file system
 chmod: changing permissions of '/snap/core18/1049/run/lock': Read-only file system
 chmod: changing permissions of '/snap/core18/1049/tmp': Read-only file system
 chmod: changing permissions of '/snap/core18/1049/var/tmp': Read-only file system

  OK
 Done.
  To EXIT Press x Key, Press ENTER to Continue
- Above you can see that permission has changed. All changes have been completed. Then it will display message that JShielder has fully configured Ubuntu for creating & deploying web applicaitons.


Cyber Security Researcher. Information security specialist, currently working as risk infrastructure specialist & investigator. He is a cyber-security researcher with over 25 years of experience. He has served with the Intelligence Agency as a Senior Intelligence Officer. He has also worked with Google and Citrix in development of cyber security solutions. He has aided the government and many federal agencies in thwarting many cyber crimes. He has been writing for us in his free time since last 5 years.


