
Introduction
Phishing attack is the most common types of attacks. All are organizations are struggling hard to combat this type of attack on their employees. International Institute of Cyber Security offers cyber security awareness training course/program for employees covers every aspect of Phishing attacks with real life demonstrations. There are many tools out there to create phishing pages in minutes. So there is always a need of a toolkit that can help organization test there security posture.
KingPhisher is a phishing campaign toolkit, using this toolkit we can test user’s by sending the malicious link via email using SMTP server and stealing user credentials. We use kingphisher tool for promoting user awareness on real world phishing attacks. This tool has a user-friendly interface easy to use with multiple campaigns. This tool is built on python language.
Environment
- Os: Kali Linux 2020 64 bit
- Kernel-Version: 5.6.0
Installation Steps
- Use this command to clone the project.
- git clone https://github.com/rsmusllp/king-phisher
root@kali:/home/iicybersecurity # git clone https://github.com/rsmusllp/king-phisher
Cloning into 'king-phisher'...
remote: Enumerating objects: 182, done.
remote: Counting objects: 100% (182/182), done.
remote: Compressing objects: 100% (130/130), done.
remote: Total 19773 (delta 88), reused 111 (delta 51), pack-reused 19591
Receiving objects: 100% (19773/19773), 7.00 MiB | 1.89 MiB/s, done.
Resolving deltas: 100% (14519/14519), done.
- Use the cd command to enter into king-phisher and tools directory
root@kali:/home/iicybersecurity# cd king-phisher/tools/
root@kali:/home/iicybersecurity/king-phisher/tools#
- Use this command to install the dependencies of the tool bash install.sh
root@kali:/home/iicybersecurity/king-phisher/tools# bash install.sh
INFO: Linux version detected as Kali
Install and use PostgreSQL? (Highly recommended and required for upgrading) [Y/n] Y
INFO: Will install and configure PostgreSQL for the server
INFO: Attempting to update apt-get cache package information
Get:1 http://dl.google.com/linux/chrome/deb stable InRelease [1,811 B]
Get:2 http://dl.google.com/linux/chrome/deb stable/main amd64 Packages [1,151 B]
=================================================================================================SNIP===================================================================================================================================
E: The repository 'http://ppa.launchpad.net/mozillateam/firefox-next/ubuntu groovy InRelease' is not signed.
N: Updating from such a repository can't be done securely, and is therefore disabled by default.
N: See apt-secure(8) manpage for repository creation and user configuration details.
ERROR: Command 'apt-get update' failed, please correct the issues and try again
- When we tried to the launched tool by using this command ./KingPhisher but we got below error.
root@kali:/home/iicybersecurity/king-phisher# ./KingPhisher
Loading .env environment variables…
Traceback (most recent call last):
  File "/usr/lib/python3.8/runpy.py", line 185, in _run_module_as_main
    mod_name, mod_spec, code = _get_module_details(mod_name, _Error)
  File "/usr/lib/python3.8/runpy.py", line 144, in _get_module_details
    return _get_module_details(pkg_main_name, error)
  File "/usr/lib/python3.8/runpy.py", line 111, in _get_module_details
    __import__(pkg_name)
  File "/home/iicybersecurity/Desktop/king-phisher/king_phisher/client/__init__.py", line 35, in <module>
    import gi
ModuleNotFoundError: No module named 'gi'
- For this use run command pipenv install. To install complete dependences.
root@kali:/home/iicybersecurity/king-phisher# pipenv install
Pipfile.lock not found, creating…
Locking [dev-packages] dependencies…
✔ Success!
Locking [packages] dependencies…
✔ Success!
Updated Pipfile.lock (8c871c)!
Installing dependencies from Pipfile.lock (8c871c)…
An error occurred while installing https://github.com/matplotlib/basemap/archive/v1.2.1rel.tar.gz#egg=basemap --hash=sha256:3fb30424f18cd4ffd505e30fd9c810ae81b999bb92f950c76553e1abc081faa7! Will try again.
  🐍   ▉▉▉▉▉▉▉▉▉▉▉▉▉▉▉▉▉▉▉▉▉▉▉▉▉▉▉▉▉▉▉▉ 67/67 — 00:12:53
Installing initially failed dependencies…
  ☤  ▉▉▉▉▉▉▉▉▉▉▉▉▉▉▉▉▉▉▉▉▉▉▉▉▉▉▉▉▉▉▉▉ 1/1 — 00:00:37
To activate this project's virtualenv, run pipenv shell.
Alternatively, run a command inside the virtualenv with pipenv run
- Here, dependencies are successfully installed.
- Next, use this command to start the king-phisher server.
- sudo systemctl start king-phisher.service
root@kali:/home/iicybersecurity/king-phisher# sudo systemctl start king-phisher.service
root@kali:/home/iicybersecurity/king-phisher#
- king-phisher server successfully started.
- Now, use this command to launch the tool ./KingPhisher
- king-phisher toolkit successfully launched.
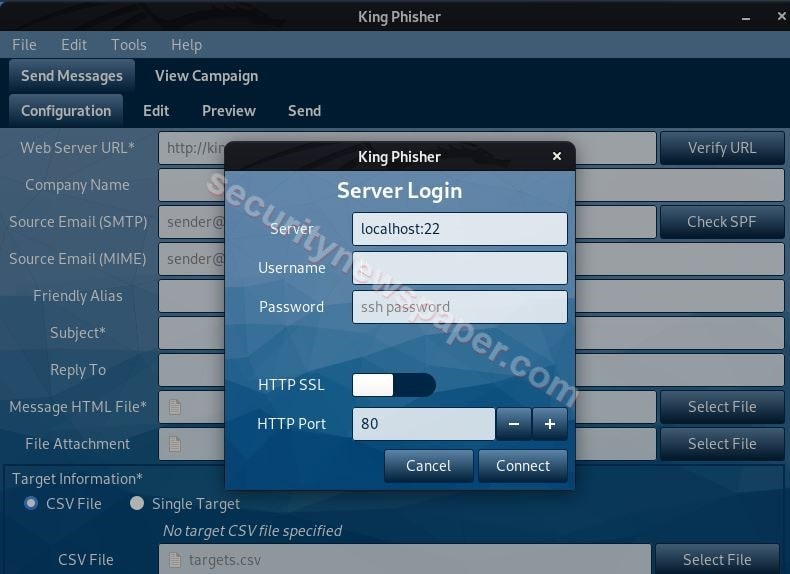
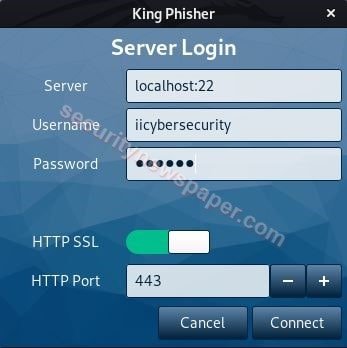
- Here, we have to login to the server by simple specifying the Kali user’s credentials.
- After logging in, we have to create a campaign. Follow these steps
- click of File -> Open Campaign -> Create Campaign
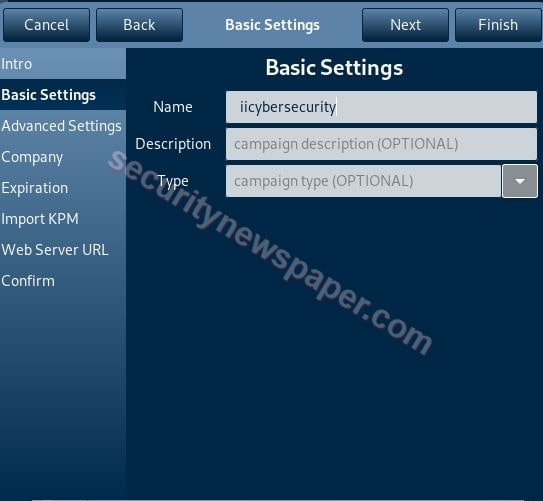
- Enter the required details and click on finish.

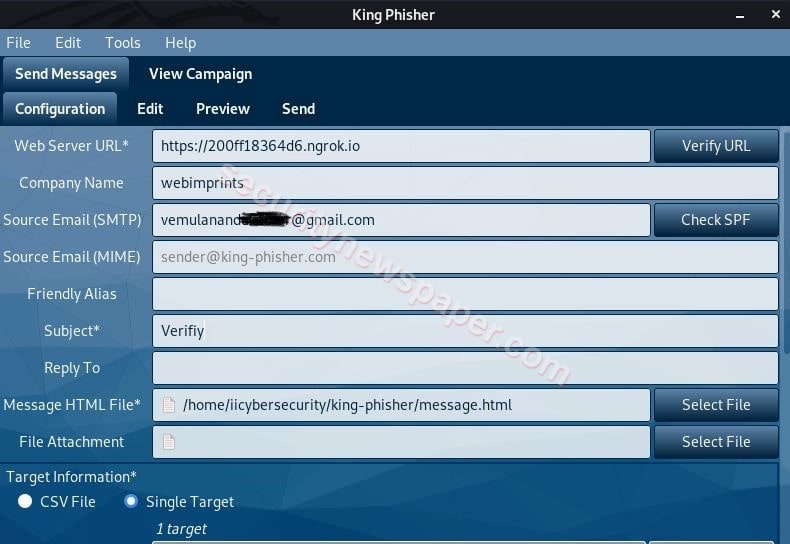
- Now enter the required details, which are marked as mandatory.
- Now in Webserver URL enter the phishing URL which can be created using nexphisher tool.
- In Source Email (SMTP) option, we have used Gmail Email address, which will be used to send phishing mails.
- As we are using Gmail for sending mails, we will have to configure Gmail SMTP Settings in the King-Phisher tool.
- Follow these steps to configure SMTP
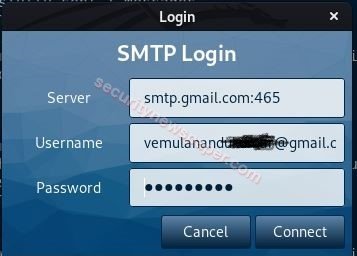
- Edit -> Preferences -> SMTP Server.
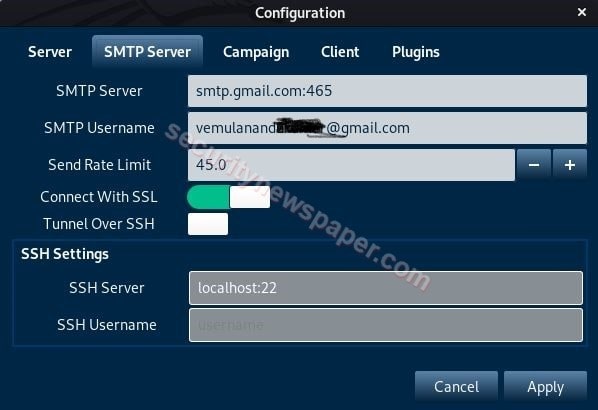
- Here, enter the server with a port number, SMTP Username, turn on the Connect With SSL option and click on Apply.
- Now, enter the Email address in the Source Email (SMTP) section.
- Subject: This is just like Email Subject.
Message of HTML File
- Here, we have created the Small HTML Program.
<HTML>
<Body>
<H1> IICybersecurity </H1>
<a href=https://200ff18364d6.ngrok.io> Click Here To Get New Password </a>
</body>
</HTML>
- Saved as Message.html.
- Now, select the message.html file in Message HTML File section by specifying the file path.
- In Target Information, select the Single Target type and enter the Name with Target’s Email Address.
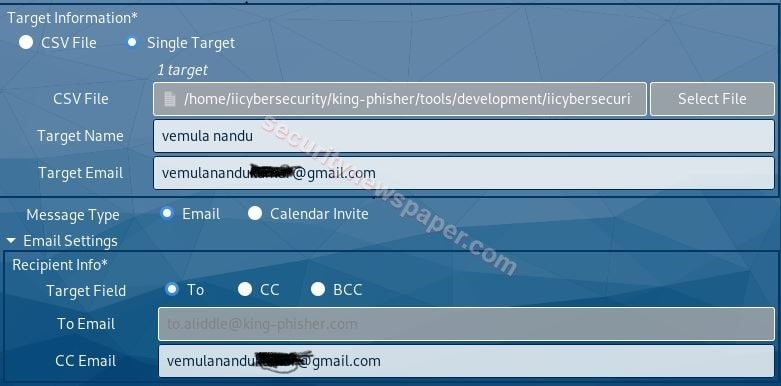
- Now, we have successfully entered the required details to attack the victim.
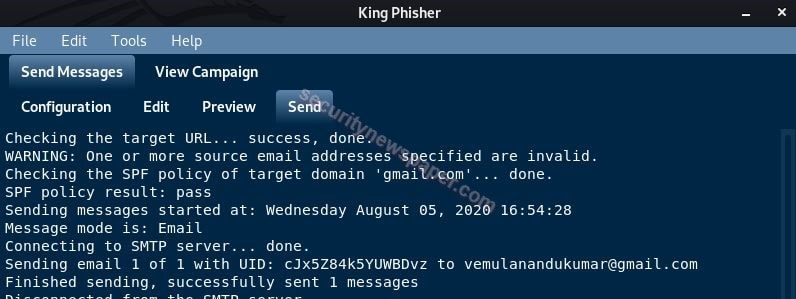
- Next, come to the sent tab and click on send.
- It will ask the SMTP Login Password, enter the password, and click on connect.
- It will send’s the Email to the target, we can check in the logs.
- Now, id the target opens the Email, he/she will see something like this:

- All these test are performed with live demonstration in the security awareness Services offered by International Institute of cyber Security.
- If victim click’s on the link, it will open’s the Instagram phishing page, we created using nexphisher tool.

- If the victim enter’s his/her credentials, these credentials will be sent to the hacker’s machine.
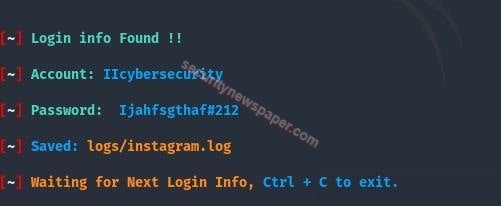
- Successfully we got the victim’s credentials.
Conclusion
As we saw on how to steal the victim’s credentials by sending malicious links to the victim via Email using the KingPhisher tool with the SMTP server and port forwarding server. KingPhisher toolkit help organizations in security assessment with respect to Phishing attacks.


Cyber Security Specialist with 18+ years of industry experience . Worked on the projects with AT&T, Citrix, Google, Conexant, IPolicy Networks (Tech Mahindra) and HFCL. Constantly keeping world update on the happening in Cyber Security Area.


